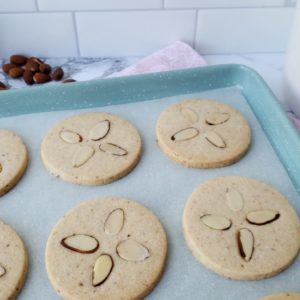
This is my signature shortbread sugar cookie recipe that I use for most of my decorated cookies because it doesn’t spread and it’s a flavor everyone loves. Try this recipe for your cut out cookies and adjust the flavor to your liking!
Are these technically shortbread or sugar cookies?
They’re kind of both. It’s fine to call these either “decorated sugar cookies” or “decorated shortbread cookies.” But I’m going to refer to any of my cookie recipes that can used as a base for cookie decorating as “shortbread sugar cookies.”
Shortbread Cookies
- 2 parts flour to 1 part fat
- No eggs
- No leavening agent
- Dense and crispy
Sugar Cookies
- 3 parts flour to 2 parts fat
- Contains eggs
- Contains a leavening agent
- Light and Chewy
All of my shortbread sugar cookie recipes don’t rise or spread, can be used for cookie decorating, have egg, but no leavening agent, and have a 2 ¼ parts flour to 1 part fat. Which makes them fall somewhere between a shortbread and a sugar cookie. They’re both shortbread and sugar cookies, and neither shortbread or sugar cookies, at the same time. They’re Shrodinger’s cookies!
All of my shortbread sugar cookie recipes can be used for slice-and-bake cookies as well!
- Perfect Cookies for Cookie Decorating
- No-Spread Shortbread Sugar Cookies Recipe
- Adding Subtle Flavors
- Favorite Ingredient Brands
- Why Granulated & Powdered Sugar?
- Why Cornstarch?
- Can I Re-Use Dough Scraps?
- Extracts and Emulsions
- Best Chocolate and Cocoa Powder
- Rolling Out, Kneading and Cutting
- Why Return Cookies to Fridge/Freezer Before Baking?
- What if Cookies Have Air Bubbles After Baking?
- Why Have Ingredients Room Temperature?
- Do I Bake on Silicone Mats, Parchment Paper, or Foil?
- What Kind of Cookie Sheets Should I Use?
- Add-ins
- Food Processor
- Paddle or Whisk Attachment?
- What if I Don’t Have a Stand Mixer?
- How Long Does Cookie Dough Last in the Refrigerator?
- Can Cookie Dough or Cookies Be Frozen?
Perfect Cookies for Cookie Decorating
When I first started decorating cookies I realized that decorating a cookie is much like building a house, you need to start with a solid foundation. If you have a cookie that spreads into a pinterest-fail-blob, even with the most amazing decorating skills, you’re still going to end up with a cookie that looks like a pinterest-fail-blob.
I tested out dozens of shortbread recipes, and modified them until I came up with the perfect, no-fail recipe that gives me delicious, perfect cookies, every single time. I’ve baked thousands of cookies with this recipe and I’ve been told time and time again that my cookies don’t just look good, but they also taste amazing!

The All Access Online Cookie Class Pass will give you access to over 24+ current and future online cookie decorating classes for one low price. Your subscription never expires, and you will have access to every online cookie decorating class, including my cookie decorating masterclass.
After testing dozens of cookie recipes, I came up with one that combined everything that worked to give me a non-spread cookie that actually tastes good. There was something about combining both granulated and powdered sugar that just made the texture and taste perfect.
At first I just used vanilla, then I started adding lemon extract, and noticed clients would rave about the taste. But when clients started telling me they were some of the best cookies they’ve ever eaten was when I switched from extracts to emulsions. Then I learned if you added some cornstarch to your cookie dough, it keeps your cookies from spreading even more. So, I did all the research & development, trial & error, and experimenting for you. You’re welcome!

Butter, sugar, flour, eggs, cornstarch and some flavoring is all you need! I use no leavening agents (baking powder or baking soda) in this recipe because you don’t want your cookies to rise or spread. If you want to get fancy, you can add some lemon zest!

As an Amazon Associate I earn from qualifying purchases.
No-Spread Shortbread Sugar Cookies Recipe
At this point, if you’re just here for my recipe, here it is. If you want to read on past the recipe, I cover my favorite ingredient brands, equipment, tips and tricks, FAQs, and even a little cookie science!

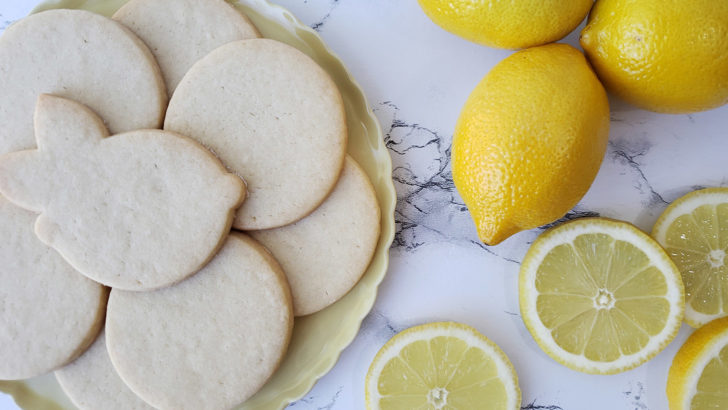
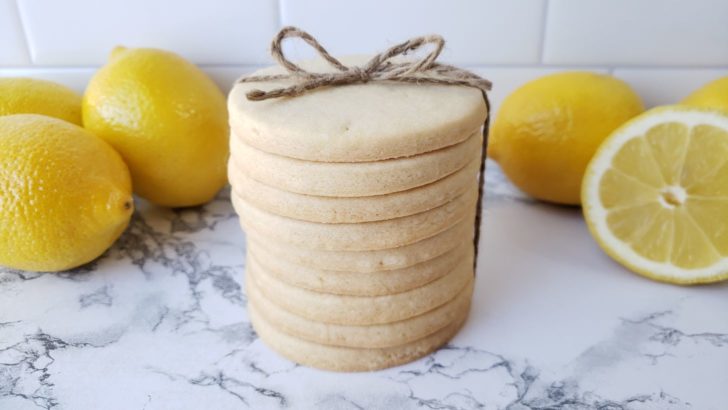
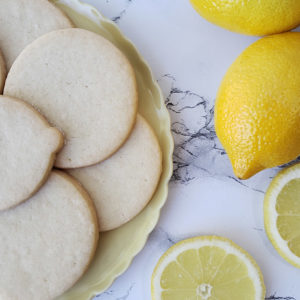
Lemon No-Spread Shortbread Sugar Cookies
Equipment
- measuring cups and spoons
- mixing bowls
- whisk
- spatula
- citrus zester optional
- cling wrap
- large knife
- cookie cutters optional
Ingredients
- 1 cup unsalted butter room temperature
- ½ cup granulated sugar
- ¼ cup powdered sugar
- 1 large egg room temperature
- 1 ½ teaspoons lemon emulsion or extract
- 1 teaspoon vanilla extract
- 1 tablespoon lemon zest optional
- 2 ½ cups all-purpose flour
- 1 tablespoon cornstarch
Instructions
- Whisk dry ingredients (flour and cornstarch) together and set aside.
- Cream butter and sugars with paddle attachment, on medium-low speed, until fluffy and pale in color (about 5 minutes).
- Add egg, extracts, and zest (if using) and mix on low speed until thoroughly combined. Scrape down the paddle with a spatula, and then continue to mix on low speed for another 30 seconds to ensure everything is fully incorporated.
- Add dry ingredients, all at once, and mix on low speed just until dough starts to come together and no dry bits remain. Do not overmix.
- Turn out dough onto cling wrap, wrap tightly, and refrigerate overnight (or at least 4 hours).
- Knead, roll, cut out cookies, and return to fridge or freezer until firm. Leave a couple inches between cookies.
- Bake at 350° for ~15 minutes, turn pan, and bake for another 1-5 minutes until edges are starting to turn a golden brown.
- Remove from oven and allow to fully cool on cookie sheet before handling.
Notes
- The reason for adding 1-2 tablespoons of cornstarch to your dough is to prevent your cookies from shrinking or spreading during baking.
- If making slice-and-bake cookies, split dough in half, roll into logs, wrap tightly in cling wrap or parchment paper, and refrigerate before slicing and baking.
Nutrition
Adding Subtle Flavors
Most of my shortbread recipes have slightly subtle flavors. The more you add to a cookie, the more likely it is the cookie will lose its shape, spread, shrink, or bake unevenly. You can add tons of chocolate chips, dried fruit, candy, extracts, nuts, and sprinkles to drop cookies, but once you start adding too much to a shortbread, it’ll lose its shape and structural integrity. Which is not what you want as a base for cookie decorating.
Favorite Ingredient Brands
I’ve had students ask me what brand of everything I use. For the butter… just butter. Unsalted. Nothing fancy. I’ve tried my recipe with every brand of butter on the market, and I did not taste a difference, especially after decorating cookies with royal icing. If you’re using my recipes for slice-and-bake cookies, feel free to splurge on the good European butter. Otherwise, I’m usually baking with Costco butter in my house.
I only use C&H sugar and King Arthur or Bob’s Red Mill flour in my kitchen. All of my recipes were developed using C&H sugar (Domino). It’s the only sugar on the market that still uses 100% cane sugar. I’ve noticed that if I’ve ever used any other brand of sugar other than C&H, my recipe will always turn out slightly…different. So, it’s only sugar in the bright pink package for this girl.
King Arthur is just a good, employee-owned company that puts out some great products. They also do all kinds of do-gooder type things in their community, so I like to support them and you should too.
Bob’s Red Mill is family-owned business that makes top-tier products. If you’re gluten-free, Bob’s has one of the best GF 1-to-1 Baking Flours on the market.
I’m not sponsored by any of these companies, I’m just a fan of their quality products.
C&H and Domino are sister brands, and sell the same product. C&H is primarily sold on the West Coast of the United States, and Domino is primarily sold on the East Coast.
Why Granulated & Powdered Sugar?
I tried recipes with just granulated sugar, and just powdered sugar, and it wasn’t until I started using both that I ended up with a perfect dough that bakes consistently every time. I don’t know why, I was a biology major who was terrible at chemistry. I’m sure there’s a scientific answer to why it works, but I couldn’t tell you what it is.
Why Cornstarch?
If you’ve ever had your cookies (or pie crust) shrink up, spread, or come out misshapen after being baked, it probably had to do with gluten development. Wheat and other grains contain a mixture of the proteins glutenin and gliadin. When you add water to those two proteins you form gluten.
Gluten is strengthened by kneading your dough, and the more you knead, the more you strengthen gluten strands. While this is great for bread, the same can’t be said for cookie dough. No one wants tough chewy cookies. This is why when you add your dry ingredients into your wet ingredients, you only want to mix it long enough until it’s just combined, resulting in less gluten development. If you continue mixing your dough past that point, you’re going to develop and strengthen those gluten strands. And then when you knead and roll out your dough, you’re going to further develop and strengthen gluten even more.
This is also why if you’ve ever baked, or eaten, gluten-free pastries, you’ll have noticed that they’re typically on the crumbly side. No gluten means that they’re missing the strength and structure that gluten strands provide.
And this is where cornstarch comes into play. Cornstarch is going to inhibit gluten production. Which means you can get away with re-kneading your dough scraps without developing too much gluten, and then have your cookies shrink up on you.
Can I Re-Use Dough Scraps?
How many times can you re-knead your dough scraps? Until you notice it starts to shrink back up on you when you’re rolling it out. Once your dough starts to shrink up on you, the cookies are still going to taste fine, but when you bake them they will shrink up. So you can either toss that dough, or bake up some snackin’ cookies, since they won’t be suitable for decorating.
Extracts and Emulsions
As far as extracts or other flavorings, just NEVER use the imitation stuff. If you want a good, high-quality, Ina Garten approved vanilla extract, you can’t go wrong with Neilson-Massey vanilla. Otherwise, the vanilla extract you can get at any grocery store will work just fine. I typically use a combination of vanilla and lemon for my cookies, but if you don’t like lemon, try one of my other recipes.
You can also make your own vanilla extract!
LorAnn’s is where I source all my extracts and emulsions these days. Emulsions are water-based flavors that won’t bake out like alcohol-based extracts. When you use emulsions, it’s a 1-to-1 swap of emulsion for extract, and the flavor won’t be stronger, just better. LorAnn’s has over 20 gluten-free, nut-free and low-carb flavors, and they’re available at most craft/hobby stores, restaurant supply, specialty food stores, or online.
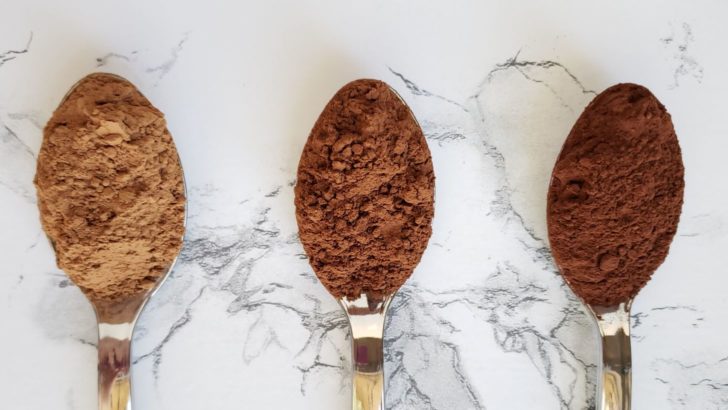
Best Chocolate and Cocoa Powder
If you want the best chocolate possible, stick with Valrhona and Callebaut. I only use Valrhona cocoa powder in all of my pastries and baked goods. Valrhona is a French company that has been producing chocolate for 100 years, and while it’s a bit more pricey than the store bought stuff, you’ll really see and taste the difference. I did a side-by-side comparison of different cocoa powders for you, and you can see how Valrhona is a deep, rich, auburn brown, compared to even the store bought “dark chocolate” cocoa powder. They also have chocolate “feves” (wafers) that you can use instead of chocolate chips or chocolate chunks.
If you bake a lot, I also recommend investing in a bag of Callebaut “callets” (chocolate chips). I use these for any recipe that calls for chocolate chips, I temper them to use as dipping chocolate, and they’re also what I use to make cocoa bombs. Stored properly, milk chocolate will keep for a year, and dark chocolate for nearly 2 years.
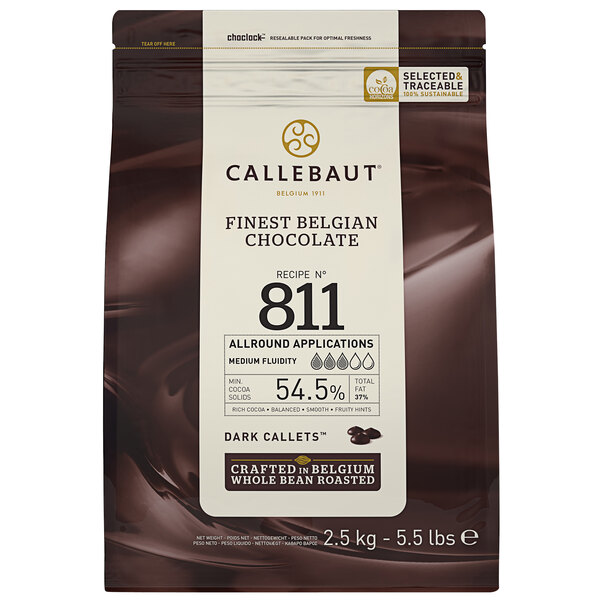
Callets are only sold in bulk 5.5 lb bags, and cost about $10/lb if purchased online. Amazon charges more for the product, but you won’t have to pay for shipping. Online restaurant supply companies charge a little less, but the shipping is usually a little pricey. If you have access to a restaurant supply in your area, that’s where you’ll find the best prices.
Rolling Out, Kneading and Cutting
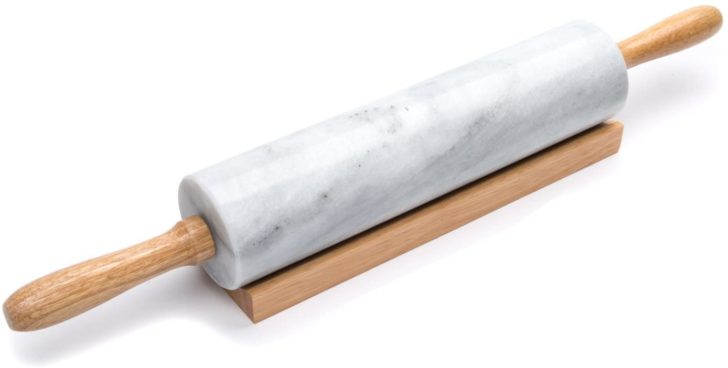
My students ask me a lot of questions about how I roll out my cookie dough so uniformly. Do I use rolling pin bumpers, dowels, or a dough sheeter? Nope! The one thing I’ve never had an issue with is rolling out my cookie dough. There are lots of things I was terrible at when it came to baking and cake/cookie decorating, but rolling things out wasn’t one of them. My suggestion is to do what works for you. What works for me is using a marble rolling pin. The weight of a heavy marble rolling pin is going to do a lot of the work for you. Plus, marble will stay cool, so it’ll keep your dough cool.
Second is that I’ve never rolled out my cookie dough using parchment paper or a pastry mat. I just dust my granite countertop and top of the cookie dough with a little flour. I’ve seen other bakers suggest that using flour to roll out will “dry out” your cookies, but a light dusting of flour would be the equivalent of adding a tablespoon extra of flour to your entire batch of dough, so it will not dry out your cookies.
I also keep turning my dough as I roll it out. So do a few passes with a rolling pin, and then turn your dough 180°, and continue to roll out and turn, until your dough is the desired thickness. Since we all have a dominant/stronger arm, this will keep you from having dough that slants down on your dominant side.
Since I don’t use bumpers or dowels to guide the thickness, I’ve measured my baked cookies, and they’re almost always perfectly ¼” thick. You can go slightly thinner or thicker than that, and you’ll just have to watch your cookies closely and adjust the baking time accordingly. However, if you roll your cookies out too thick (over ⅓”), you’ll run into them baking unevenly, and they can spread or shrink.
Why Return Cookies to Fridge/Freezer Before Baking?
Some cut-out cookie recipes call for using cold butter to make your dough. I use softened butter, but then fully chill the dough before rolling out and cutting, and then return the cookies back to the fridge, after I’ve cut them out, before baking in a preheated oven. I’ve found this gives you the best textured cookies for the following reasons.
Tenderness!
I use softened butter for my dough because butter, like most fats, will coat the flour particles. This is best achieved when the butter is soft. Think about how much easier it is to spread softened butter on your toast, than cold butter straight from the fridge. By coating the flour, butter will prevent those particles from holding as much liquid and binding together to build structure, and, back to gluten, will also inhibit gluten development! This is what gives cookies a “melt-in-your-mouth,” crumbly, tender texture!
Flakiness!
Butter is integral to achieving flaky, crispy layers. When the water in butter is heated up, it evaporates and creates little pockets of air that give pastries distinct separate layers — think flaky layers in a croissant. If you put warm butter in a hot oven, it just melts and doesn’t quickly evaporate, and you end up with cookies that have a gummy texture and lose their shape. This is also why you always want to make sure to preheat your oven. If you put cold pastry in a warming oven, the water in the butter won’t quickly evaporate, and you’re back to gummy cookies that don’t hold their shape.
Leavening!
I don’t use a leavening agent in my cookies (baking powder or baking soda) because I don’t want them to spread, but butter acts as a type of leavening agent. The water in the butter evaporating, creating those flaky layers, will give some lift and loftiness to the cookies, so you don’t end up with sad, dense, hockey pucks.
What if Cookies Have Air Bubbles After Baking?
Speaking of getting those flaky layers by creating pockets of air in your cookies — what if you end up with giant air bubbles on the surface of your cookies? It happens! Typically caused by a larger piece of butter not getting fully incorporated into the dough, or by creating a large pocket of air while kneading your dough. All you have to do to fix it is, as soon as your cookies are done baking, while still hot, you put a piece of parchment paper or a silicone mat on top of your cookies, and then place another cookie sheet on top of that. The weight of the cookie sheet will compress the air bubbles just enough to flatten them out.
Why Have Ingredients Room Temperature?
Always make sure all of your ingredients are at room temperature or they won’t incorporate. If you’re in a rush you can microwave your cold butter on the DEFROST setting for 15-20 seconds at a time until it’s room temp. Don’t nuke it too long since I’m sure you want to avoid melting it and making a big mess in your microwave. And you can also stick your eggs in some lukewarm water to bring them to room temp as well. Just don’t use hot water, or you’ll end up with soft-boiled eggs, and fully dry them off before you crack them open.
Do I Bake on Silicone Mats, Parchment Paper, or Foil?
I always bake my cookies on silicone baking mats. You can also use parchment paper. Wax paper is not meant to be used with heat, and the wax will melt in the oven.

I do not recommend baking on foil. Foil is designed to conduct heat, so any part of your cookie that is touching the foil will bake faster than the rest of your cookie. The last thing you want is a batch of cookies with burnt bottoms.
What Kind of Cookie Sheets Should I Use?
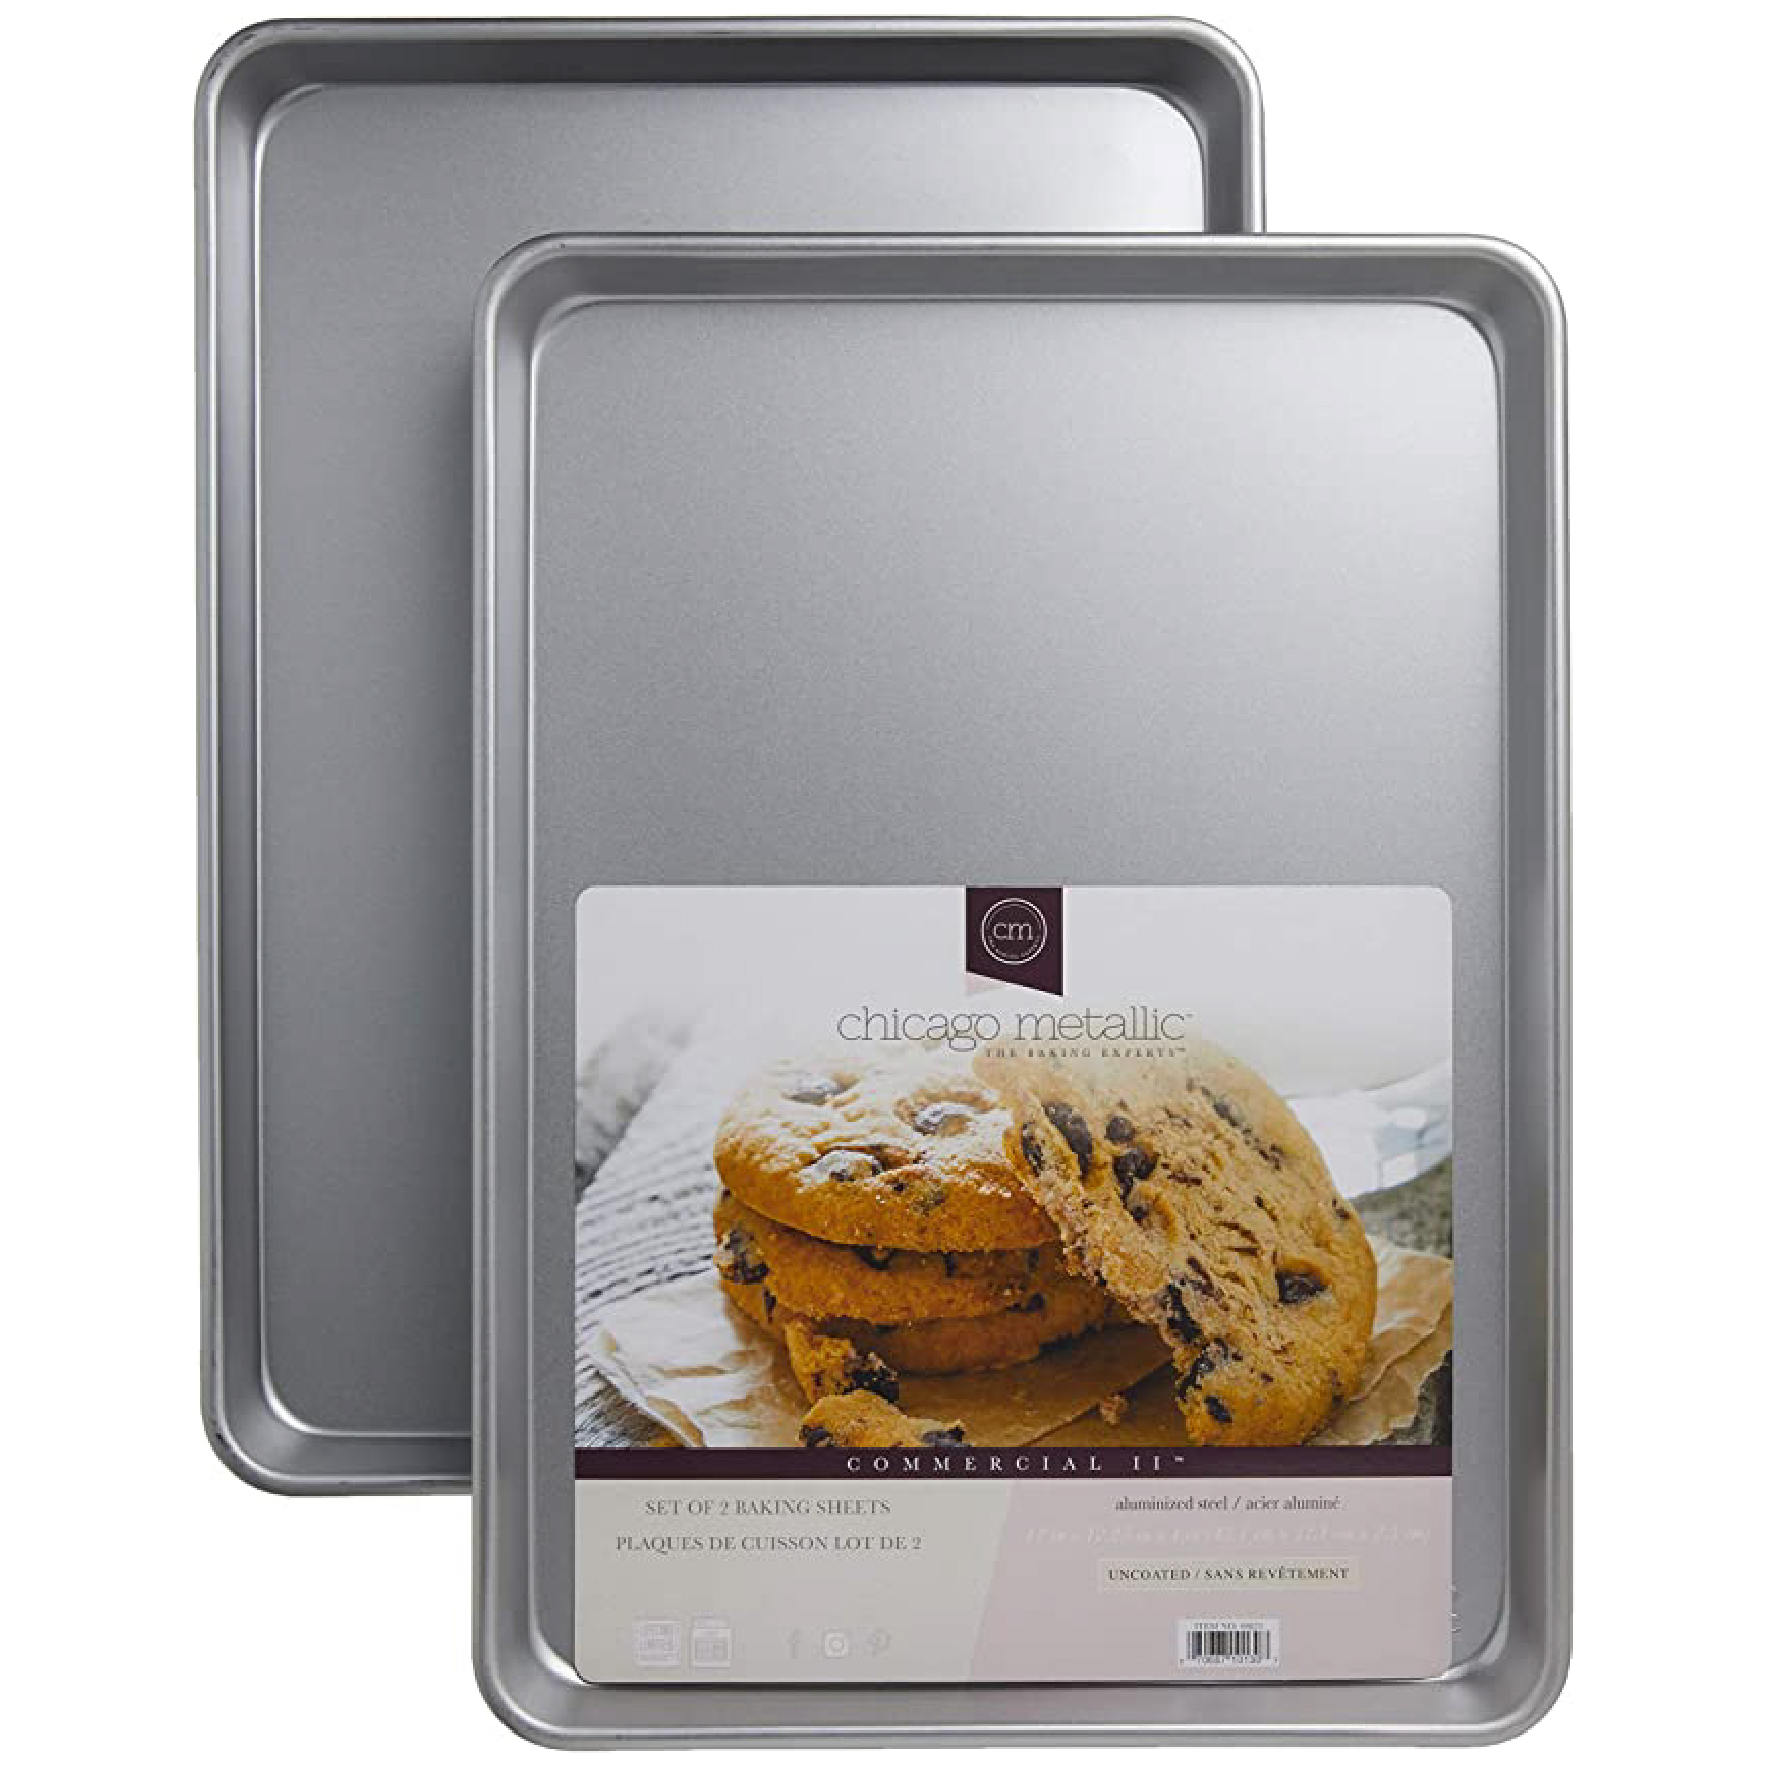
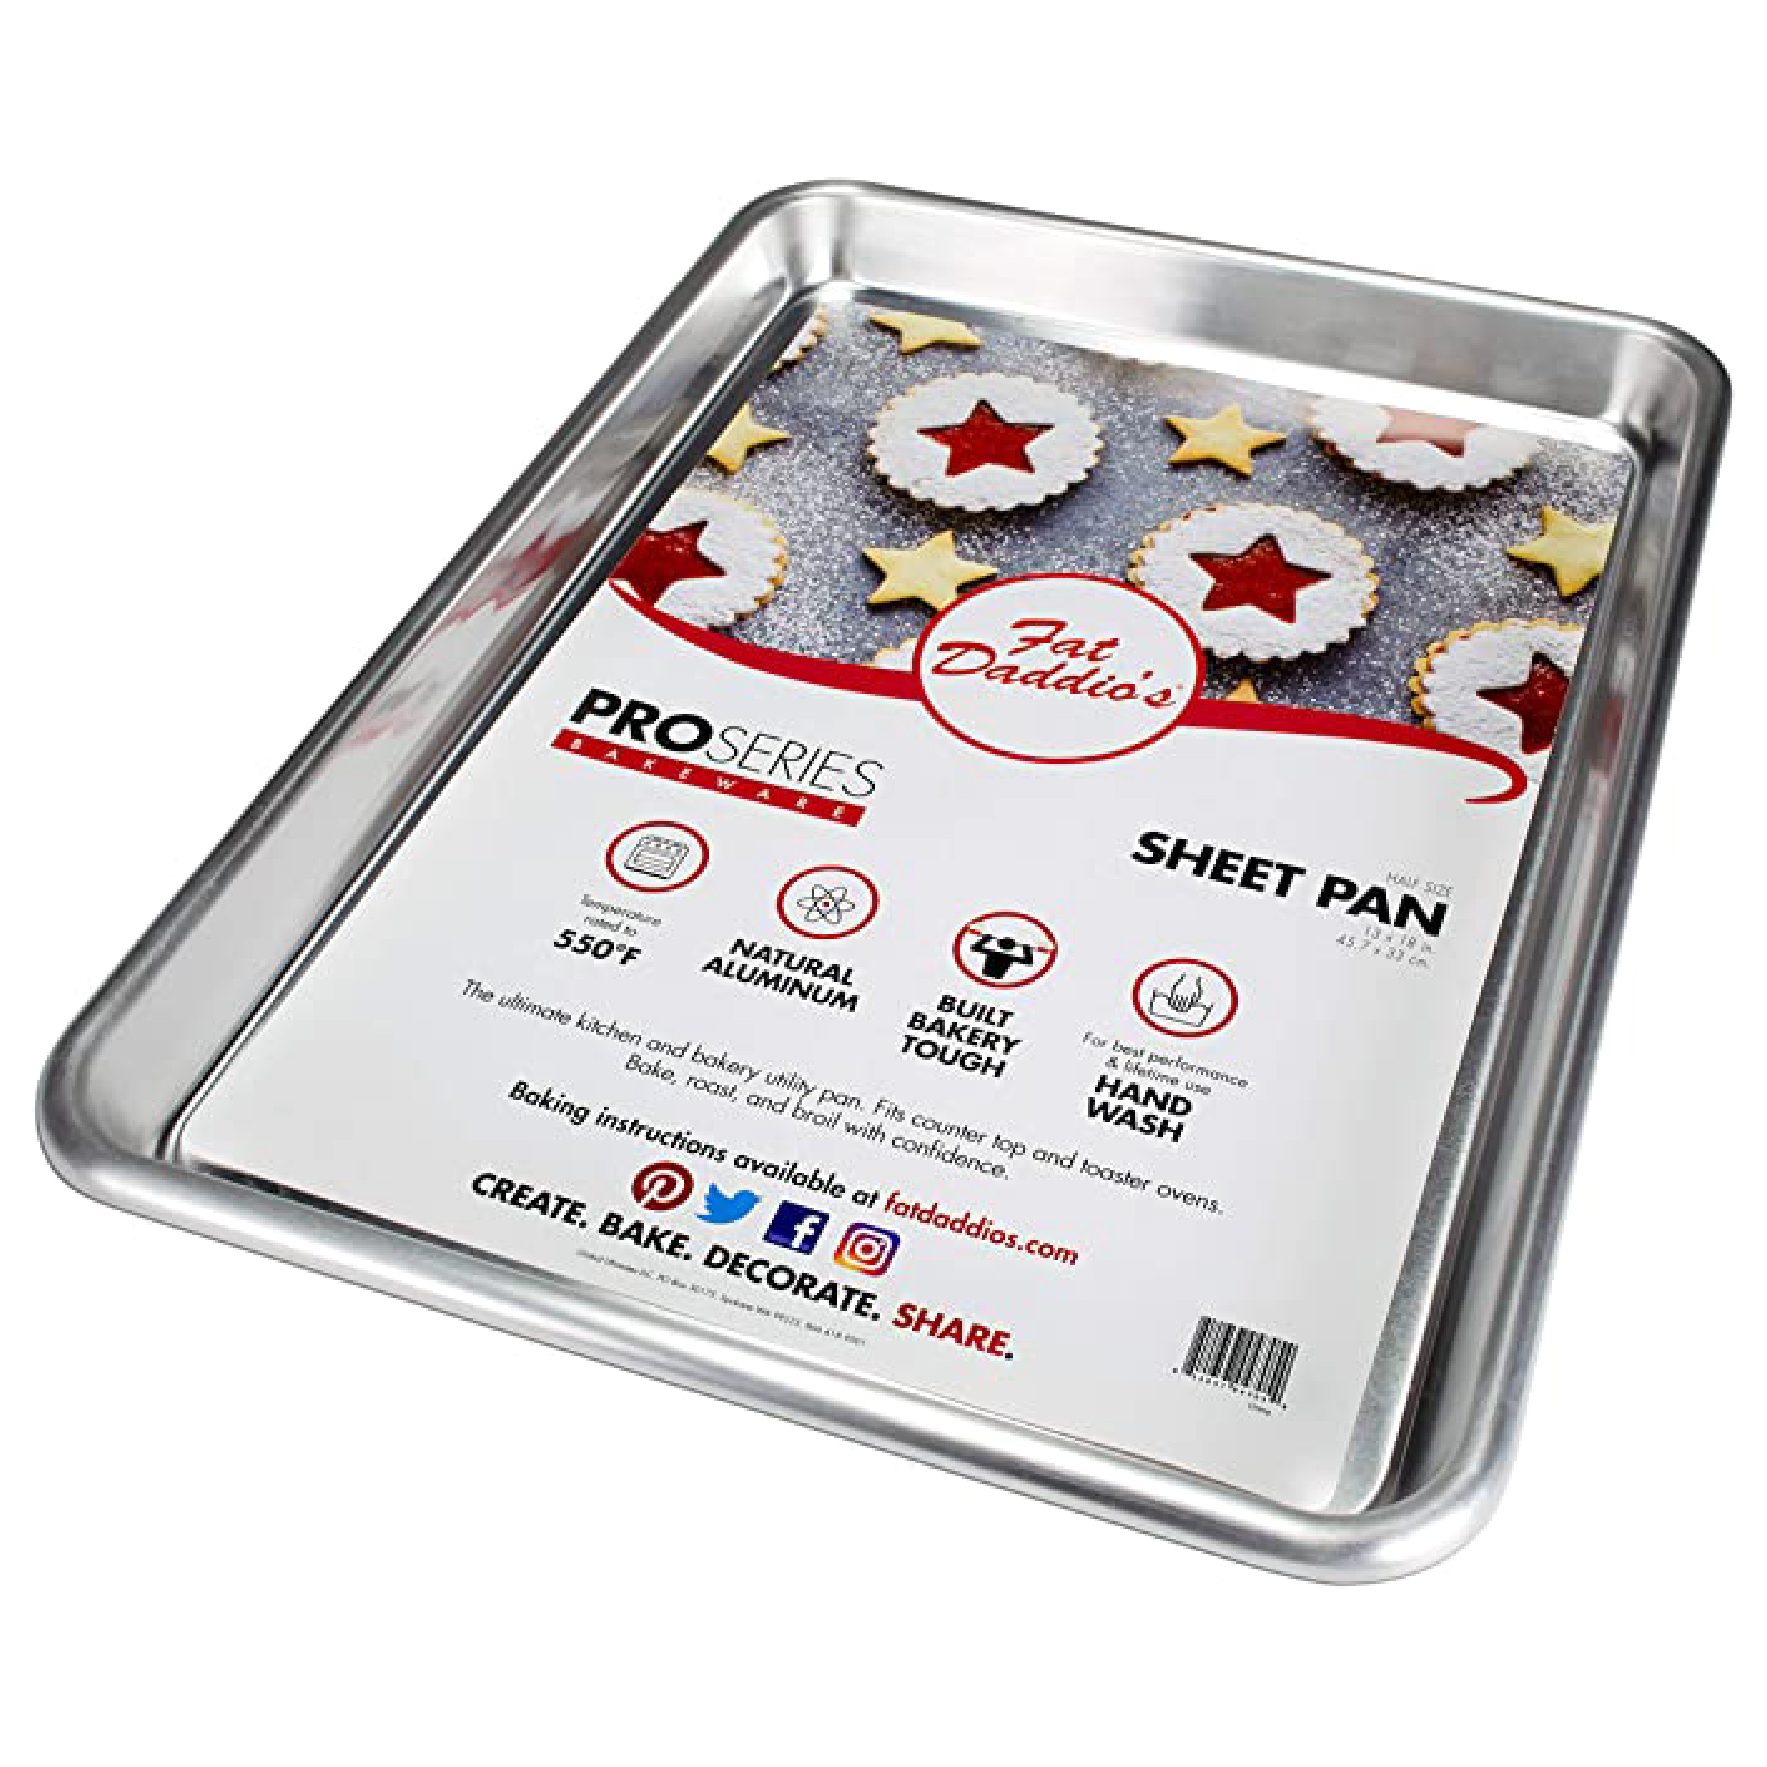
If you are looking for heavy duty, commercial grade, high quality cookie sheets, I recommend either Fat Daddio’s or Chicago Metallic. I use both in my kitchen, I bought them at last 10 years ago, I’ve baked hundreds of thousands of cookies, and they all still look brand new. Make sure to hand wash them, and they will last you a lifetime. The Chicago Metallic ones even come with a lifetime warranty.
Add-ins
With any cut out cookies that you’re using for cookie decorating purposes, you want clean edges and flat tops. It’s the reason you don’t add any leavening agent to these cookies, you don’t want them to puff up, rise, spread, or have domed tops. This is why you also don’t want to add large add-ins (sprinkles, chocolate chips, nuts…etc), because when you use a cookie cutter, you’ll end up with jagged edges. So my tip is to always grind or chop any add-ins to the consistency of coarse sand. I highly suggest investing in a food processor, if you don’t already have one. You can also chop everything by hand, it just takes a little more time and patience.
Food Processor
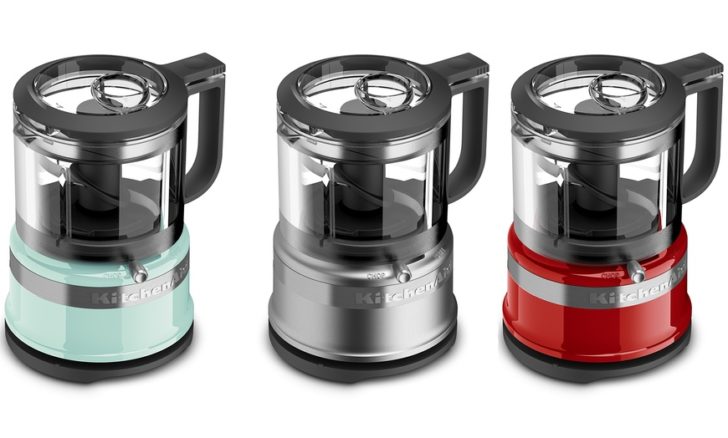
I was so excited when I could finally afford to buy myself a nice food processor. The kind that I always coveted whenever I saw them on someone’s kitchen counter. The fancy food processor that comes with a case for all the attachments! Yeah, I almost never use that thing. It’s giant, complicated, and a pain in the booty to clean. I use the little mini food processor that was ¼ the price that I picked up at (probably) Target on a whim because I liked the color. It’s the perfect size when I just need to chop up ½ cup of some ingredient, and so much easier to use and clean.
Paddle or Whisk Attachment?
Good rule of thumb is to always use a paddle attachment for cookie dough, and a whisk attachment for cake batter. Some bakers suggest using a whisk attachment for wet ingredients, and then will have you switch to a paddle attachment to incorporate the dry ingredients. I have found that unnecessary, and I still get fluffy whipped butter using a paddle attachment, plus you end up with less things to clean.
If you have a KitchenAid stand mixer, and you’re using the metal paddle attachment, I recommend scraping down the sides and bottom of the bowl after you’ve mixed your eggs into your butter, to make sure everything is fully incorporated. However, if you invest in a Beater Blade, you’ll never have to scrape the bottom of your bowl ever again.

I love the Beater Blade! It was one of those life-changing discoveries once I started using them in my kitchen. If a paddle attachment and a spatula had a baby, it would be the Beater Blade. It scrapes the bowl while it’s mixing so that you don’t have to stop the mixer half way through to make sure your dough (or icing) is fully incorporated. You can purchase one for a 4.5-5 quart Kitchenaid, and one for a 6+ quart KitchenAid.
What if I Don’t Have a Stand Mixer?
You can still make all my cookie recipes if you only have a hand mixer. Cream butter and sugars on low speed until fluffy and light in color. Then add egg and any extracts or emulsions and mix on low with hand mixer just until incorporated. Then add in your dry ingredients, and mix with a spatula or wooden spoon and mix until no dry bits remain.
How Long Does Cookie Dough Last in the Refrigerator?
As long as your ingredients are good. Typically eggs will be the first thing to expire. So if the expiration date on your eggs is 3 days after you make your dough, your cookie dough will last 3 days. If you are using fresh ingredients, your dough will last 2 weeks in the fridge.
Can Cookie Dough or Cookies Be Frozen?
Yes, my cookie dough freezes well. Just thaw it out in the fridge overnight before you need to use it. You can also freeze baked cookies in an airtight container, and just let them come to room temperature before decorating. Cookie dough and baked cookies will last for 2-3 months in the freezer.
I’ve made a little video of me making the cookie dough. Yes, it’s 3 minutes of watching a mixer mix cookie dough, but if you have any questions about how long everything should mix, and what it should look like, the video will show you everything.
Also, does anyone else remember the C&H commercials from the 80s? Almost every time I use sugar I start singing the jingle, which isn’t annoying to everyone around me AT ALL!!!


I’m making these for my daughter’s lemon themed bridal shower. Do you have a lemon glaze or recipe for icing?
You can find my icing recipe here https://paperstreetparlour.com/royal-icing-recipe/
You can use fresh lemon juice to replace some of the water in the recipe. Or you can use a water-based emulsion or extract. Just be sure to avoid using anything that is oil-based, as oil will prevent the icing from setting.
can you use this recipe in mold
I have used the recipe in a mold before and it works. Just make sure the mold isn’t thicker than 1/2″ or the design warps.
Hello Tyler! I am so excited to try this recipe. I love to bake cookies but I’m so frustrated by the way they spread during baking. My question is, do you sift the flour first before measuring it, or just measure right from the container? Thank you!
I’ll be honest, I never sift the flour. I’ll sift flour for cakes, but I’ve never once bothered to do it for these cookies. Sometimes I’ll fluff up the flour a but with my measuring cup if it’s super compacted, and that’s the closest to sifting I’ve ever gotten.
Hi 🙂 I’ve been looking for a no-spread lemon biscuit recipe for a while and am excited to try this. Can I use lemon juice instead of lemon extract? If so would it be 1:1 substitution?
Lemon juice wouldn’t work. Extract is more concentrated, so you would need a lot more lemon juice, and it would be too much liquid in the recipe.
wow this post looks amazing!! so happy to have discovered! do you know if I can substitute the butter for oil?
I have never tried it, so I can’t say if that would work or not. My guess is that the dough would be too loose and the cookies wouldn’t bake correctly. You can substitute the butter with a margarine or dairy-free butter.
I’ve baked my cookies a week before they’re needed. I read I should freeze them to keep them fresh but could i decorate them first? how should i defrost them?
You can freeze them, but I would just leave them at room temp in an airtight container.
If you decorate and package them, they’ll stay fresh for a good month.
Oh my goodness. These cookies are awesome. They hold their shape, have great texture and taste great. I’m glad I ran into your site. Will try the frosting recipe too.
Hi,
I recently purchased a cute cookie cutter that came with four presser thingies (I’m really bad with terminology) that puts detailed shaping on top of the cookies. Would this recipe hold that shaping?
Thank you
My cookie dough works really well with cookie stamps and textured rolling pins.
Hi Tyler, thank you for sharing your recipe. I was wonder what cookie sheet you like to use and if you use parchment paper under your cookies while baking or do you grease your pan? Thank you so much!
I use parchment paper or a silicone/silpat baking mat
If 5 cups of flour take 2 tbsp cornstarch, will 15 cups of flour take 6 tbsp cornstarch?
Thank you!
Beverly
I’ve never scaled my recipe by that much, and I wouldn’t suggest doing that. I would just make 3 batches of dough instead of of scaling the recipe. When you make that volume of dough, you risk things not fully incorporating and your cookies can come out inconsistent.
Are you sure the servings is only for 24
biscuits considering that the recipe says 5 cups of flour.
Please advise.
This recipe makes 24 3″ round cookies, which are fairly large cookies. You can obviously make more cookies per batch if you are cutting out smaller cookies.
Thank you Tyler for sharing this amazing and delicious shortbread cookie recipe!! I am horrible at baking and the very thought of it gives me severe anxiety and pain due to chronic health issues..I am so grateful that you shared a simple, and easy to understand recipe with us!! My cookies turned out to be edible this time( your recipe) unlike the last time where I followed another recipe, causing them to turn out to be paper weights!!
Your recipe’s cookies were still soft the next day and I was shocked that I actually made them!! Thank you once again for your wonderful recipe, especially the suggestions about using both granulated and powdered sugar!! Your recipe was a lifesaver for someone like me who hates to bake !!
I’ve made the dough twice but it keeps coming out drier then on your video. Crumbly texture. Any idea what I’m doing wrong? Lol, completely understand if you don’t. I’m a rookie by rookie standards.
I typically cut the entire batch in half, and then I cut that half into slices, and then kind of crumble those slices up to make the dough softer and easier to work with. And I roll out the dough slowly so it doesn’t rip or tear.
Hi Such a great no-rise recipe and very tasty! Can you reuse the leftover dough from around the cutouts to get more cookies?
Yes, I will re-knead the dough scraps one more time after I cut cookies out. And then after that, I’ll incorporate the scraps into new dough to roll out. If your dough starts to shrink while you are rolling it out, you’ve over-worked the dough and activated the gluten and your cookies will end up shrinking up a bit when you bake them, so just stop cutting out cookies when the dough gets too “springy”
Tyler April, what an excellent post! Clear, concise & perfect detail & helpful suggestions. And I can see that you have a generous soul – most really good bakers don’t share a good recipe like this. Thank you & I appreciate it. I’ve been baking since I was a child & we joke that the gene skipped my daughter, but the first thing my grandkids say is, “Nana, what are we going to bake?!” They both totally get it. Thanks again…I learned new info/tricks from your post.
Warmest regards, gret
After the dough comes out of the fridge, what should the consistency be? It seemed hard at first, then a bit crumbly.
Baked cookies didn’t have smooth texture.
Also, do you recommend freezing baked cookies or cutout cookie dough?
It’s going to be hard because of the amount of butter in the recipe. I typically cut it into some slices and then smoosh those slices so that the dough is easier to work with and then I’ll knead it all together.
You want to make sure your cut out cookies are cold before they go into the oven, so I pop the tray of cookies back into the fridge or freezer for a few minutes before I put them in the oven.
Like!! Really appreciate you sharing this blog post.Really thank you! Keep writing.
Tyler I use pure butter but mine never blends like that. How long do you leave it out? Any suggestions? BTW- I love this recipe. I made it for my son’s school when he was running for office and thr Christmas office party! Thank you for posting this scrumptious cookie recipe 🙂
Hi Tina, you want to leave your butter out until it reaches room temperature. You can actually leave butter out at room temp for several days without it spoiling. Typically, I’ll take my butter out of the fridge the night before I plan on baking so that it has time to reach room temp. I’m so glad you like the cookies 🙂
I would like to add orange and cranberry to this recipe…do you think it would still work?
I would add some orange extract and orange zest, and finely chop some dried cranberries. That sounds yummy
I did and they turned out great!
Hi! I have made these a few times with different extract combinations. I want to incorporate lemon with almond and maybe vanilla…how would that turn out do you think? What other combinations have you used? Great recipe, by the way. I love the texture of the cookie! Do you have online tutorials for decorating or just classes available in home?
Hi Laurel, I’ve never tried lemon with almond, I typically use a lemon emulsion and a little vanilla extract for my cookies, so I’m not sure how that would turn out. I’d suggest maybe halving the recipe to test out if that’s a good flavor combination. And I will have online classes available soon. I recently filmed a master class (goes over how to make the cookie dough and roll them out, how to make the icing and achieve different consistencies, and then the basics of decorating with royal icing). I will also have online classes for my Thanksgiving cookie decorating, Christmas cookie decorating, and gingerbread house. Good luck!
Awesome! I will keep my eye out for those classes! Thank you for responding 🙂
Just when I thought the cookies Gods were against me, I finally have cookies! They held shape, did not shrink or grow and I have you to thank for! You made my day. Will continue to use, really appreciate it.
What thickness to you roll the cookies out to? Can you freeze the dough in a ball without cutting into a shape?
I roll my cookies out to about 1/4 inch thickness. And you can freeze your dough, this dough actually freezes really well. Just be sure to thaw it out in the refrigerator overnight before you use it.
Hi
Is it possible to make this dough with just a hand mixer – I don’t have a stand mixer ?
Thank you
Yes, you can make this dough with a hand mixer/by hand. Cream the butter and sugar with a hand mixer, then incorporate the eggs/extract using a hand mixer, but you’ll have to mix in the flour by hand using a good sturdy rubber spatula or wooden spoon.
This recipe is by far the best I’ve made! Thank you!!
One question, how do you store your unfrosted cookies and for how long?
If you can’t get around to decorating them for a day or two, they’re fine a room temp if you just wrap the sheet pan in cling wrap, or even overturn another sheet pan to make a “lid.” If you can’t get around to decorating them for more than a day or two, just stick them in a big freezer bag or tupperware container and they’re good for about a week at room temp. If you want to make them further ahead than that, stick that freezer bag or tupperware container of cookies in the freezer and they’ll be good for a couple months.
Thank you for sharing your recipe! I am just starting out and needed a good recipe for cookies I am making for a wedding. Very helpful! God bless ??.
Aw, good luck! And I’ve been told that the videos I posted have been very helpful to people, so you might want to watch over them to see how I do everything.
How thick do you roll out the dough? I’ve had some shortbread cookies that were pretty thick. Thanks
Hey Leigh, I typically roll out my cookies between 1/4-1/3″ thick. This recipe makes a VERY forgiving dough and you can also get away with rolling them thicker or thinner than that. Just adjust the baking time accordingly as you don’t want to under/over bake them. I bake them until they are just starting to darken to a light golden colour. Good luck 🙂
I found your cookie recipe!
Thank you! Wish me luck!
I’m going to make this tonight. Looks like a great recipe!
These came out perfectly, thanks!