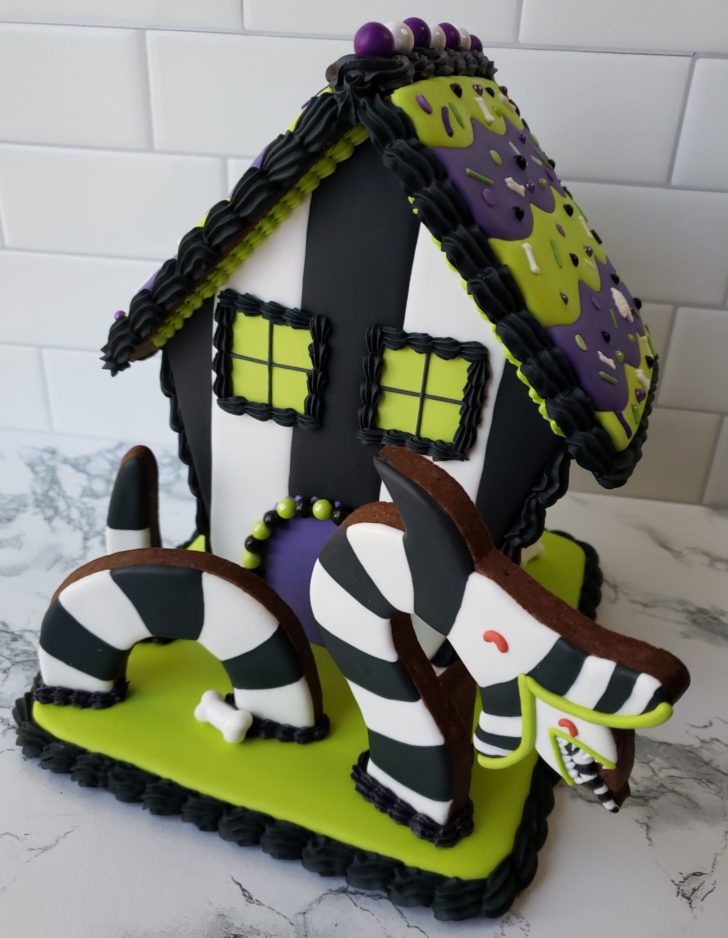
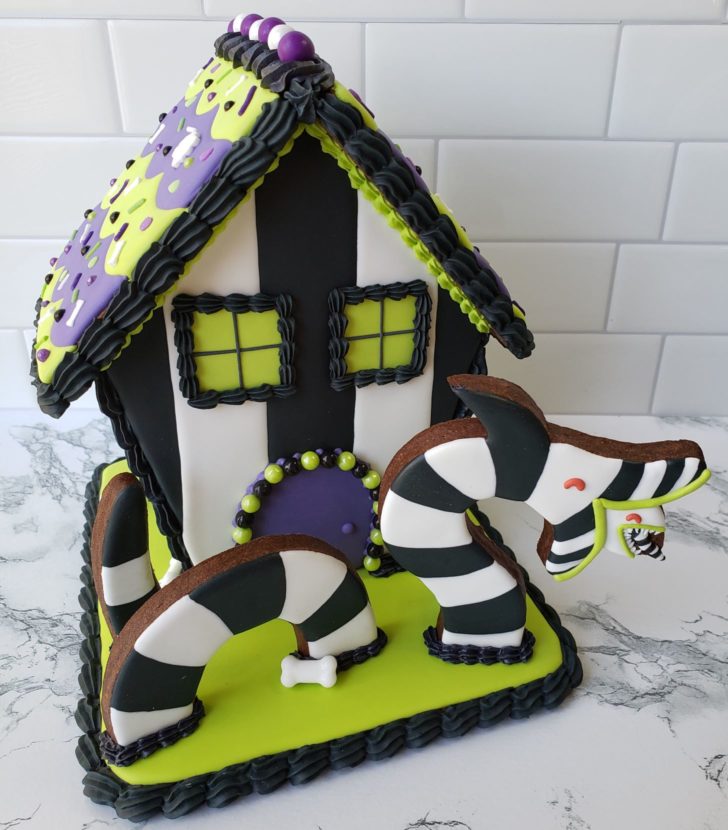
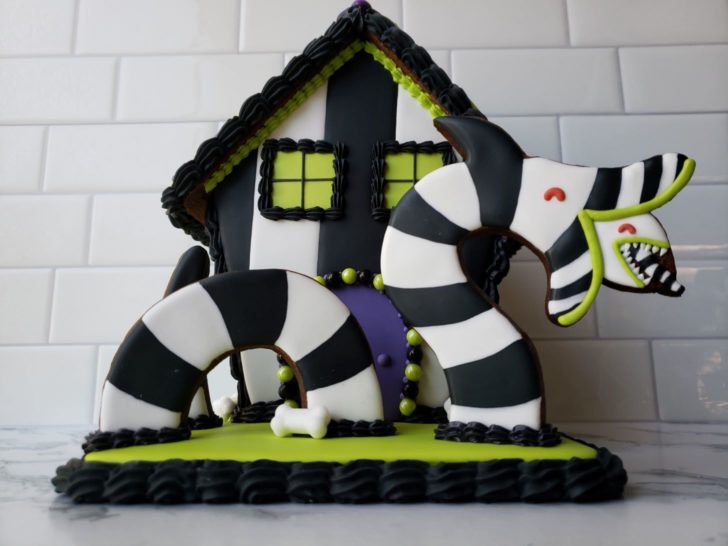
Customizing a Pre-Made, Store-Bought, Cookie House Kit
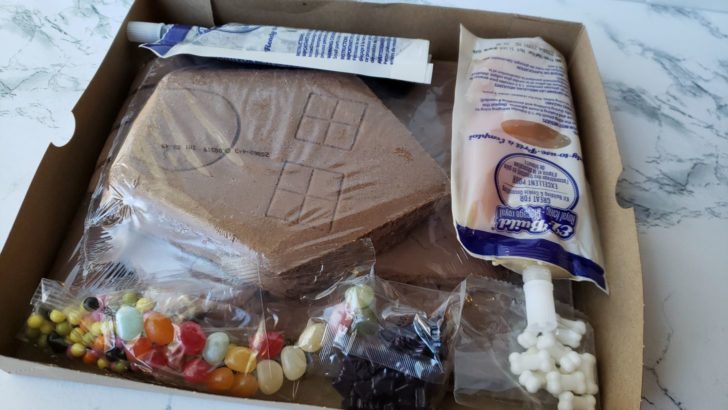
I made this cookie house using a Haunted House Chocolate Cookie Kit from Trader Joe’s. I’ve made dozens of cookie house over the years, for every holiday, and I own a ridiculous amount of gingerbread house cookie cutters. But I love being able to just grab an inexpensive, pre-made kit from the store, to customize.

This is a multi-day process. Day 1 you will decorate all the cookies, then I let them dry overnight. Day 2, after the cookies are completely dry, you can assemble the house and add embellishments.
As an Amazon Associate I earn from qualifying purchases.
Day 1
Supplies Needed:
- Pre-made cookie house kit
- One batch of royal icing
- Gel food coloring: whitener, black, neon green, purple
- Scribe tool/boo boo stick/toothpicks
- Icing bags or bottles for flooding icing
- Piping bags for stiff detail icing
- Wilton #16 & #18 star tip
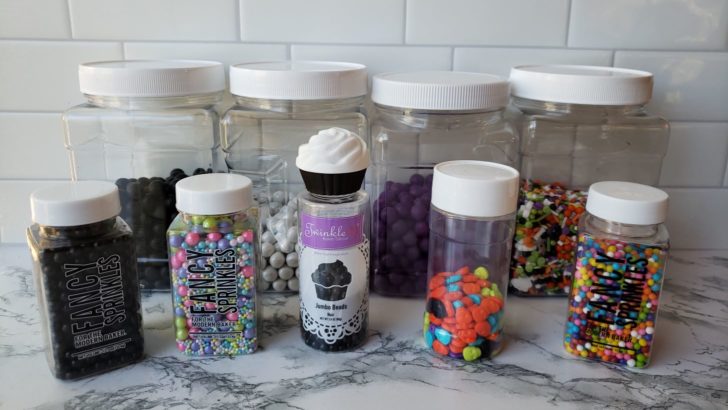
- Sprinkles/candies
- Edible pen
- Citrus zester
- Scissors
- Ruler
- 4 room temp cans of soda, bottles of water, canned goods, or heavy cups. You will use these to hold your cookie pieces together during assembly
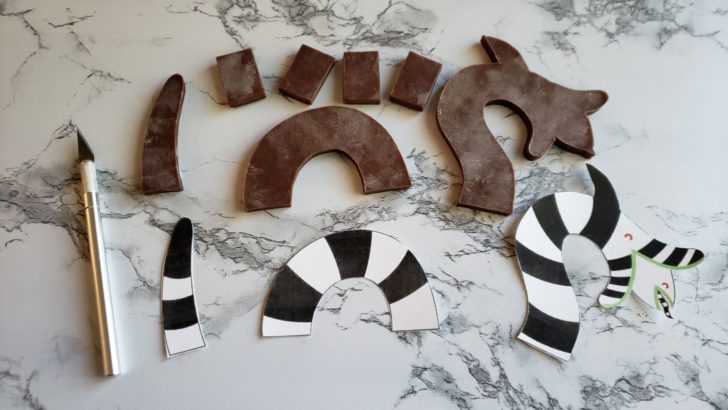
If making the sandworm cookie, you will need:
- Chocolate cookie dough
- Rolling pin
- Silicone baking mats or parchment paper
- Cookie sheet
- X-acto knife/razor blade/sharp paring knife
- Sandworm printable
- Cardstock
- Red gel food coloring
Step 1:
- If making the sandworm cookie, you will need a batch of chocolate cookie dough that has been chilled for at least 4 hours.
- Print out the sandworm printable on cardstock, cut out the pieces, and use as a stencil to cut out cookies with an x-acto blade or sharp knife.
- Cut out 4 small rectangle cookies (about ½″ x 1″ in size) to help stabilize the sandworm during assembly.
Step 2:
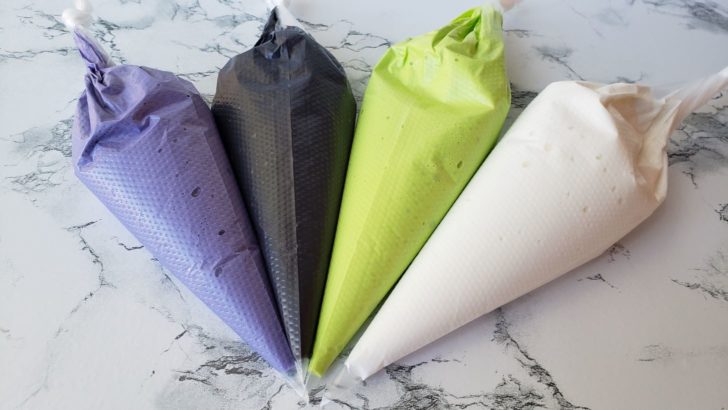
- Make a batch of flooding consistency royal icing and divide it into 4 equal parts.
- Leave ¼ white, then make green, purple and black icing.
Make sure not to overfill your icing bags. I ended up with 2 bags of each color.
Step 3:
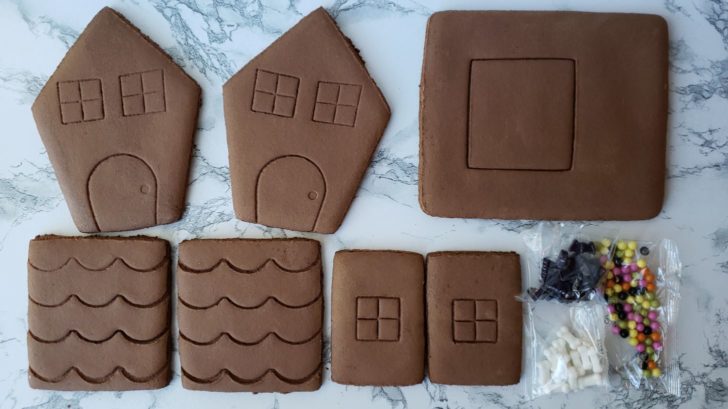
- Prepare your cookies!
Most cookies in pre-made kits have jagged edges, so I always shave them down with a citrus zester. Cleaning up the edges will help the pieces fit together better during assembly.
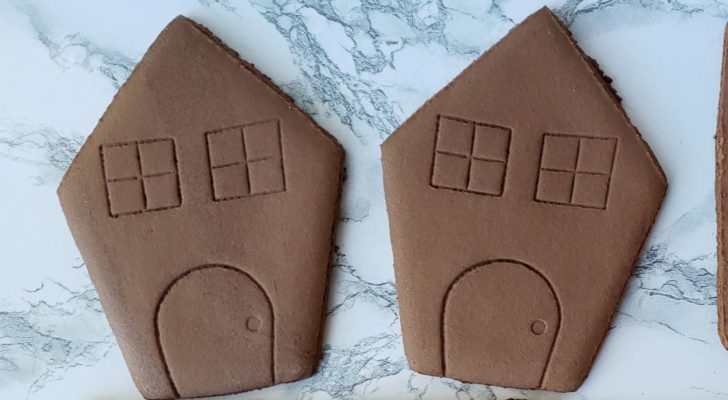

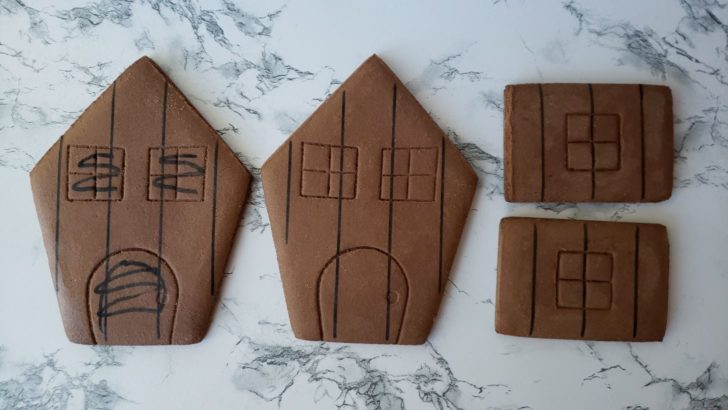
Step 4:
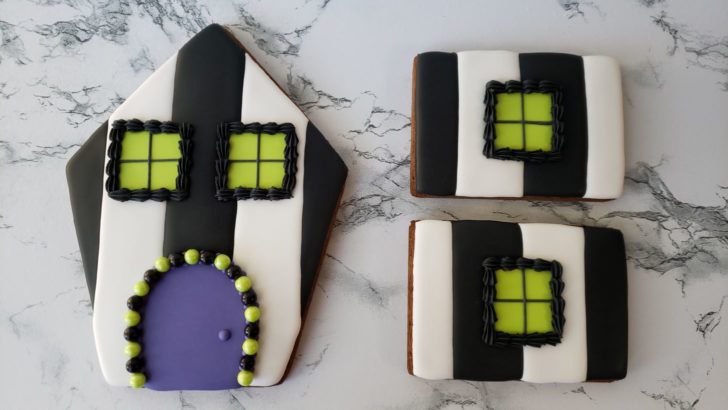
- Using an edible pen, draw out the designs on your cookies for the black and white stripes.
- Since one of the front/back pieces will be the back of the house, you only need to decorate the door and windows on one piece.
Note: I did mess up a little at this point with the side pieces. The house assembles with the side pieces in a vertical position, so I ended up with horizontal lines on the sides of the house. I liked how it looked, so it wasn’t a big deal, but if you want your stripes vertically on the sides, draw your lines going vertically.
Step 5:
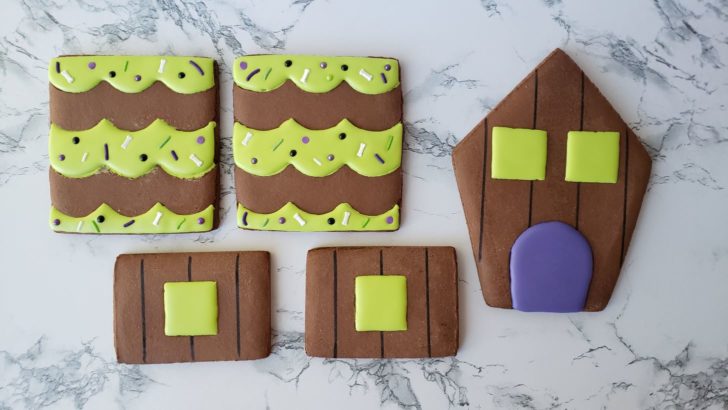
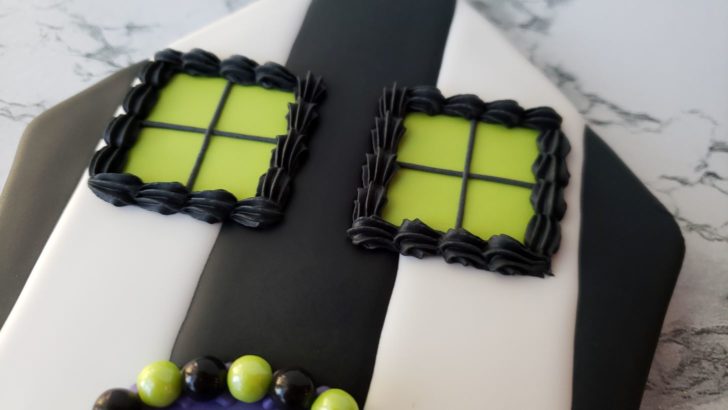
- Flood in windows on front and side pieces green.
- Flood door on front piece purple.
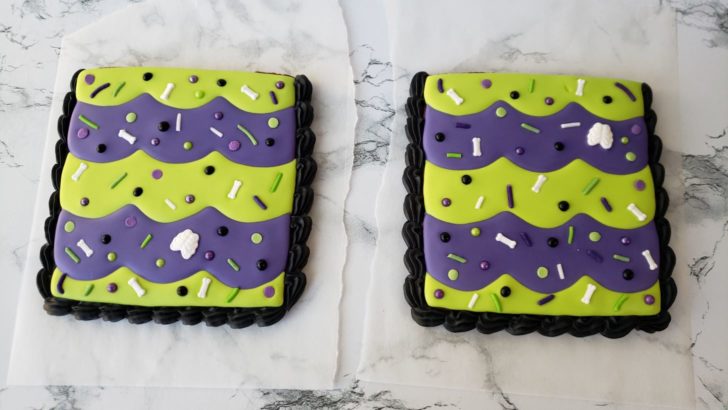
- Flood every other scalloped section on the roof pieces green, and add sprinkles while icing is still wet. I suggest doing one section at a time, as the icing will start to dry before you can add all the sprinkles.
Step 6:
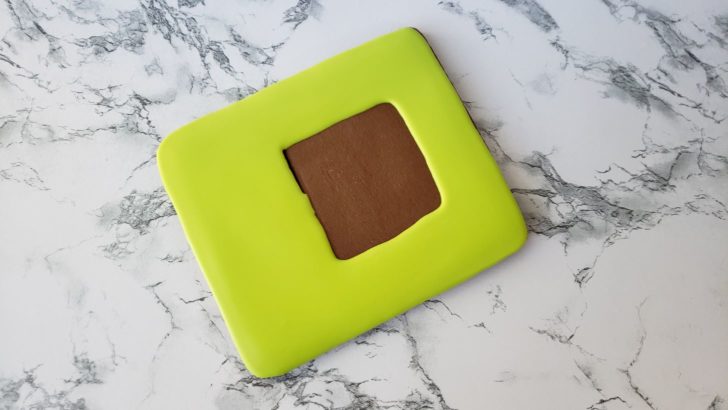
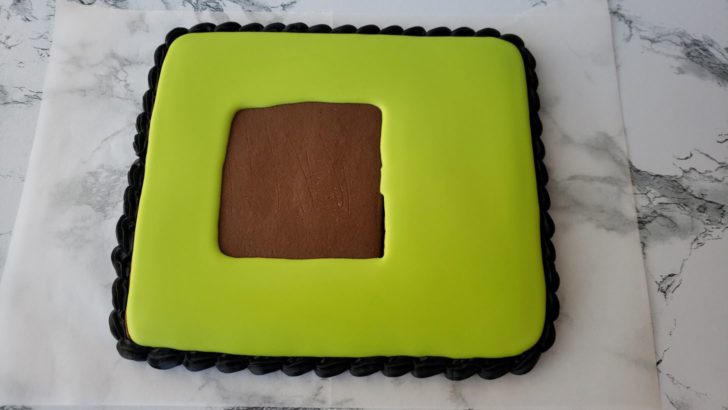
- Flood base cookie green. Because the cookie is very large, and the icing can start drying before you have flooded the entire cookie, leave the center bit un-flooded. Or you can go back and flood that piece later, but it will be covered by the house.
If icing starts to drip off the sides, because of the amount of icing, just wipe it away. Don’t worry if the edges aren’t perfect, because you’re going to cover that with detail later on.
Step 7:
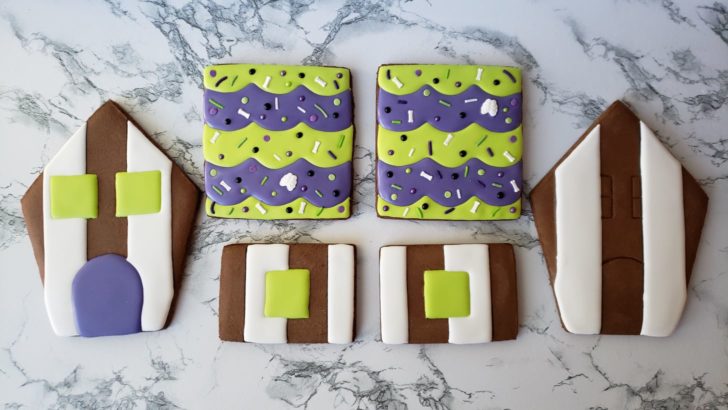
- Flood every other stripe white on the sides, front, and back pieces.
- Flood every other remaining scalloped section on the roof pieces with purple icing, and add sprinkles while icing is still wet.
Step 8:
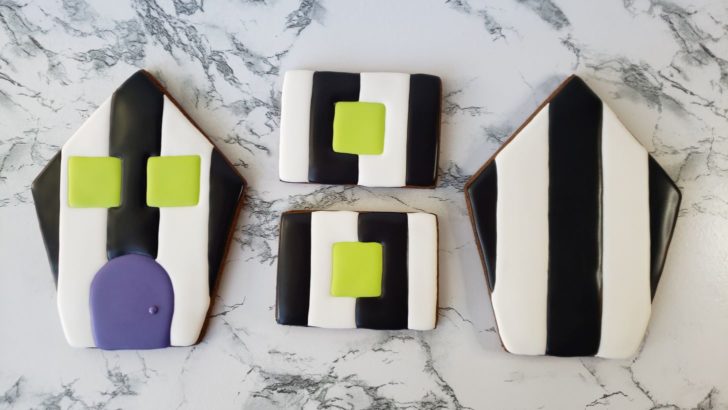
- Fill in remaining stripes with black icing on sides, front, and back pieces.
- Set cookies aside after they are done, and allow to dry for a bit.
Step 9:
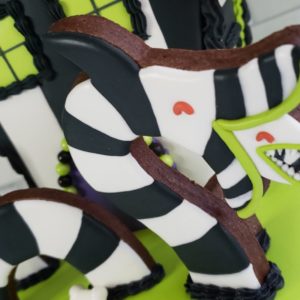
- Decorate sandworm cookies. I used a wet-on-wet technique for the stripes.
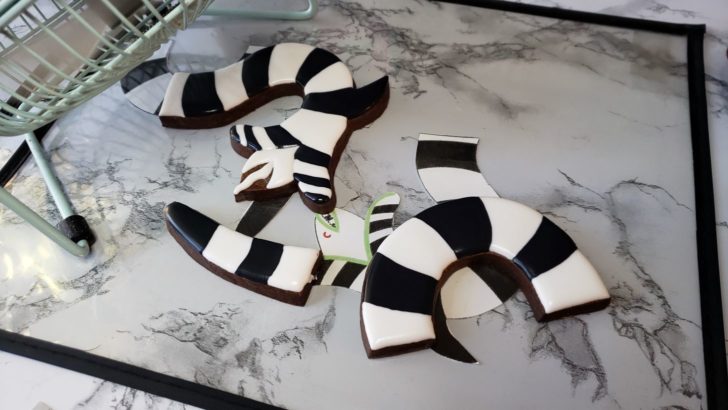
Step 10:
At this point, you can take your remaining flooding icing colors and make detail and stiff icing with them. You will need to make:
- A small amount of black detail icing for window pane lines.
- Use remaining black icing and make very stiff icing and place in a piping bag fitted with a #18 star tip.
- Make a small amount of green icing into detail icing to use for sandworm details.
- Use remaining green icing and make very stiff icing and place in a piping bag fitted with a #16 star tip.
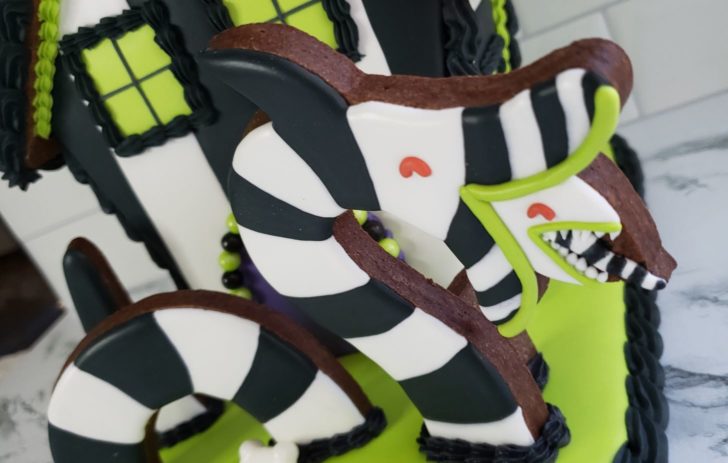
- Using your white flooding icing, make a small amount of red detail icing for sandworm eyes.
- Use remining white icing and make it into detail icing that will be used to “glue” the house together during assembly.
How to Make Stiff Icing
Step 11:
- Finish details on cookies!
- Then allow everything to dry overnight.
After making dozens of cookie houses over the years, I have learned that it’s easier to add piping details before assembling the pieces. That way you aren’t having to work at weird angles once the house is all glued together.
Day 2
Step 1:
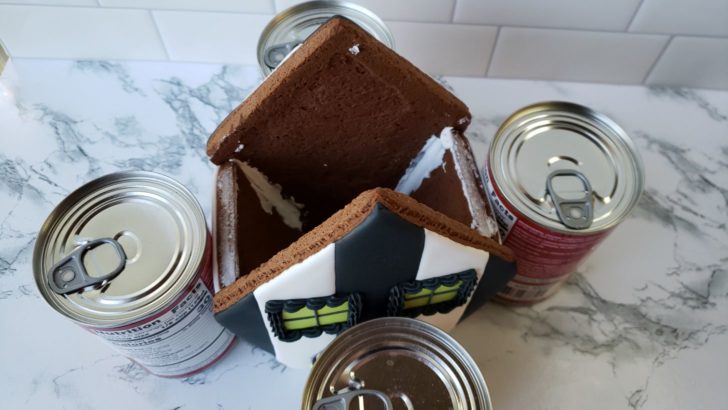
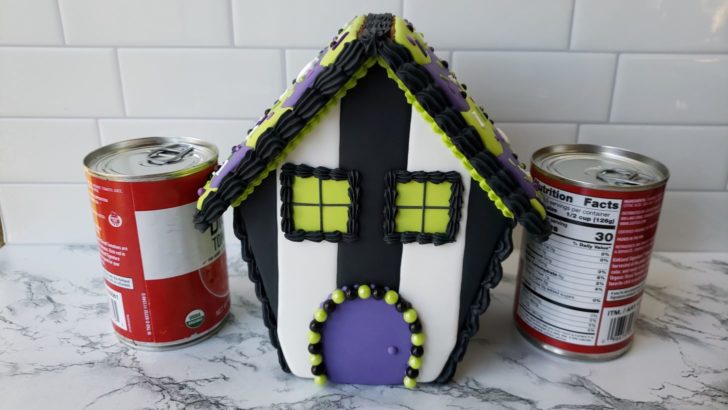
- Glue together sides, front, and back pieces with white detail icing.
- Prop pieces together with cans or bottles, and allow the assembled pieces to dry for at least 30 minutes.
Another thing I have learned from making a lot of cookie houses, is to use heavy cans or bottles to hold the pieces together while they are drying. That way, your house doesn’t fall apart on you.
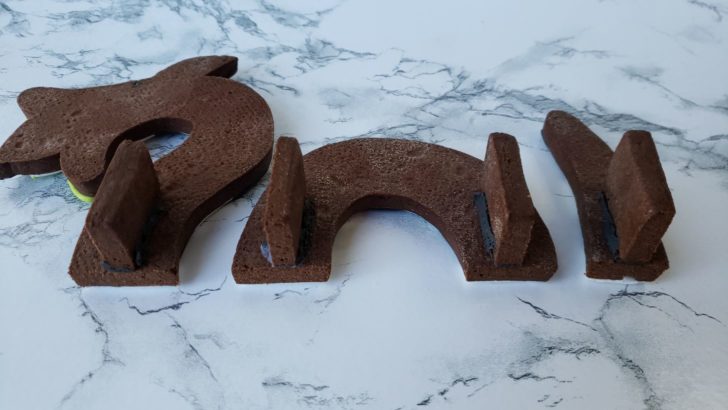
Step 2:
- Glue support pieces to back of sandworm cookies. These are going to help hold up the sandworm when you glue the sandworm to the base cookie.
Step 3:
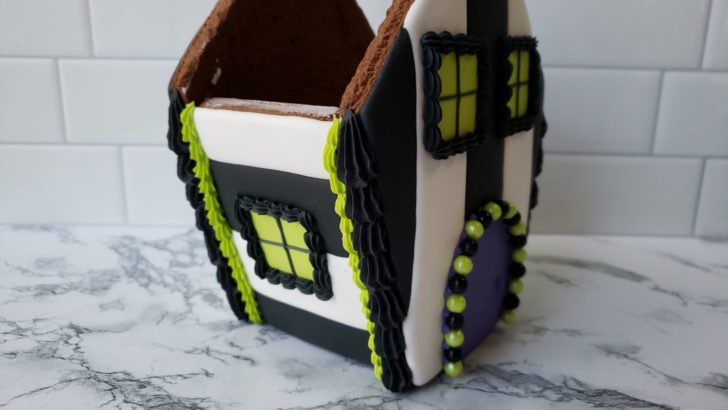
- Using the piping bag with the stiff icing and #18 star tip, pipe details along the sides of the house. With the stiff green icing and a #16 star tip, pipe alongside the black icing.
It’s much easier to add piping details to the side of the house before you attach the roof!
Step 4:
- Glue roof pieces to top of house and prop pieces up with cans or bottles.
- Pipe some black stiff icing between tops of roof pieces to help glue them together.
- And pipe green detail under the roof with stiff icing and #16 star tip.
- Allow assembled pieces to dry for at least 30 minutes.
Step 5:
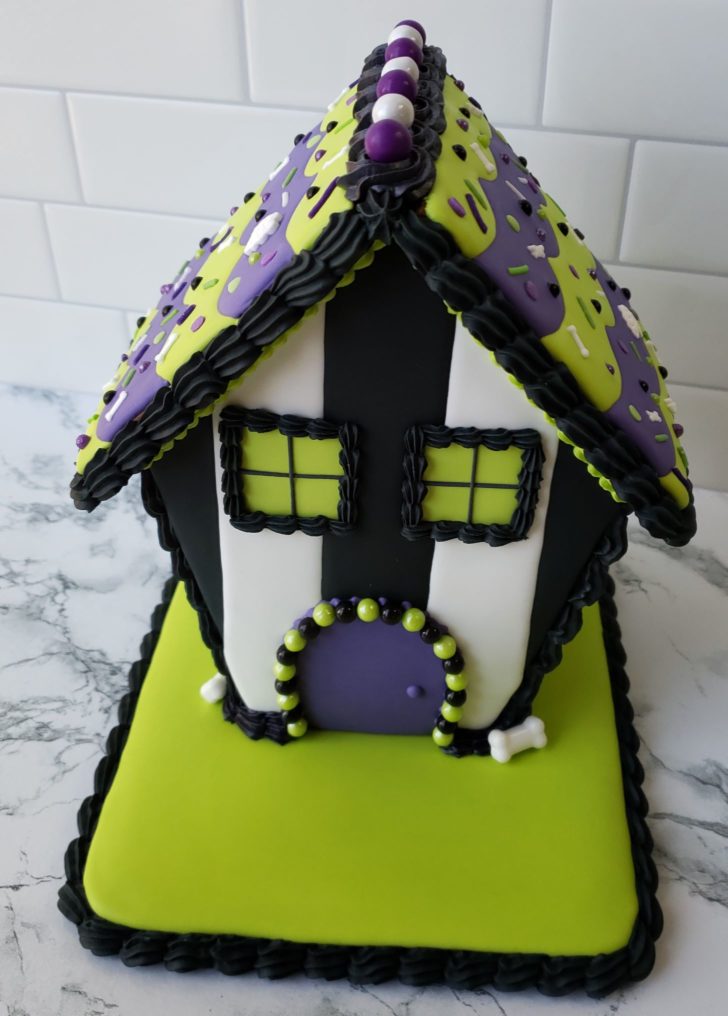
- Glue house to base cookie and pipe black detail around base of house.
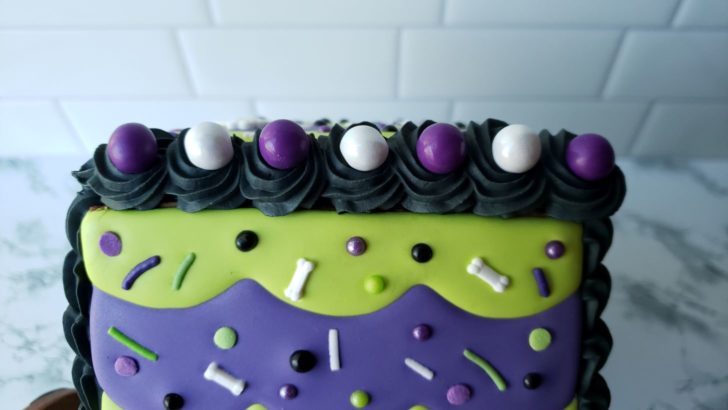
- Pipe rosettes along center of roof and place a sprinkle candy in center of each rosette.
- Glue some sprinkle candies to base around the house.
Step 6:
- Glue sandworm to base, and pipe around bottom of cookies with stiff black icing.
Step 7:
- Gloat, take a million pictures, and show off your amazing cookie house!
Royal Icing Recipe
Instructions
- Fit your stand mixer with the paddle attachment. Be sure that bowl and attachment are free of any oil or butter residue.
- Dissolve meringue powder in ¾ cup of warm water.
- Place powdered sugar into mixing bowl, turn on lowest setting and slowly drizzle in water/meringue mixture.
- Add food colouring and mix for 8 minutes on lowest speed.
- Add water as needed for a flood consistency (10-20 second icing) or powdered sugar as needed for medium or stiff consistency.
- Immediately cover icing in an airtight container or transfer to piping bags/bottles.
Video
Notes
- The icing will keep for up to 3 days at room temp and for 2 months in the freezer.
- Do not get any oil/grease in royal icing or it will not dry properly. You can wipe your bowl, spatula and paddle attachment down with vinegar or some lemon juice to remove any oil residue.
- Do not use any oil-based extracts if you want to flavor the icing, use only water-based extracts.
Nutrition
Chocolate Shortbread Sugar Cookies
Equipment
- measuring spoons and cups
- mixing bowls
- whisk
- spatula
- cling wrap
- cookie cutters
- large knife
Ingredients
- 1 cup unsalted butter room temperature
- ½ cup granulated sugar
- ¼ cup powdered sugar
- 1 large egg room temperature
- ½ teaspoon vanilla extract
- 2 cups all-purpose flour
- ½ cup good cocoa powder Valrhona if available
- 1 tablespoon cornstarch
Instructions
- Whisk dry ingredients (flour, cornstarch, and cocoa powder) together and set aside.
- Cream butter and sugars with paddle attachment, on medium-low speed, until fluffy and pale in color (about 5 minutes).
- Add egg and vanilla extract and mix on low speed until thoroughly combined. Scrape down the paddle with a spatula, and then continue to mix on low speed for another 30 seconds to ensure everything is fully incorporated.
- Add dry ingredients, all at once, and mix on low speed just until dough starts to come together and no dry bits remain. Do not overmix.
- Turn dough out onto cling wrap, tightly wrap, and refrigerate overnight (or for at least 4 hours).
- Knead, roll, cut out cookies, and return to fridge or freezer until firm. Leave a couple inches between cookies.
- Bake at 350°F for 15 minutes, rotate pan, and bake for another 1-5 minutes until edges are starting to darken in color.*
- Remove cookies from oven and allow to cool on cookie sheet before handling.
Notes
- Chocolate cookies are a little harder to tell when the edges are darkening, so you can quickly and gently press on the center of a cookie, and if they feel firm, they’re done. If you leave a dent, or they feel squishy, let them bake for a little longer.
- The reason for adding 1-2 tablespoons of cornstarch to your dough is to prevent your cookies from shrinking or spreading during baking.
- If making slice-and-bake cookies, split dough in half, roll into logs, wrap tightly in cling wrap or parchment paper, and refrigerate before slicing and baking.


Absolutely love!
Thank you so much!