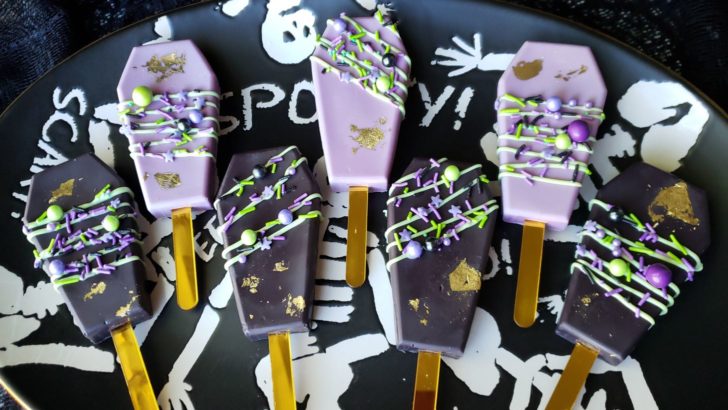
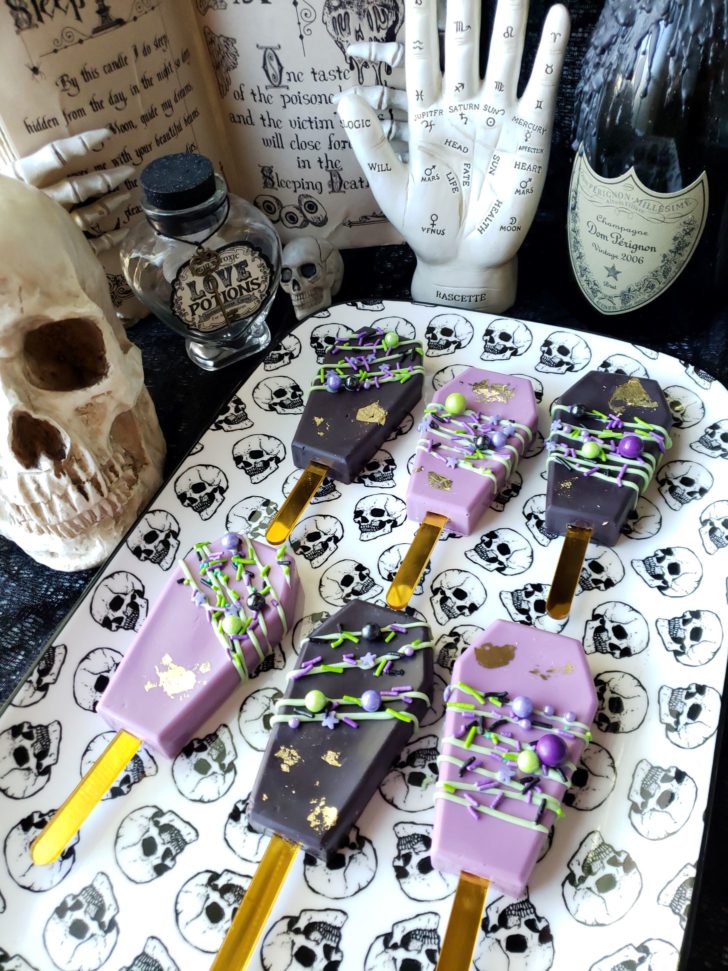
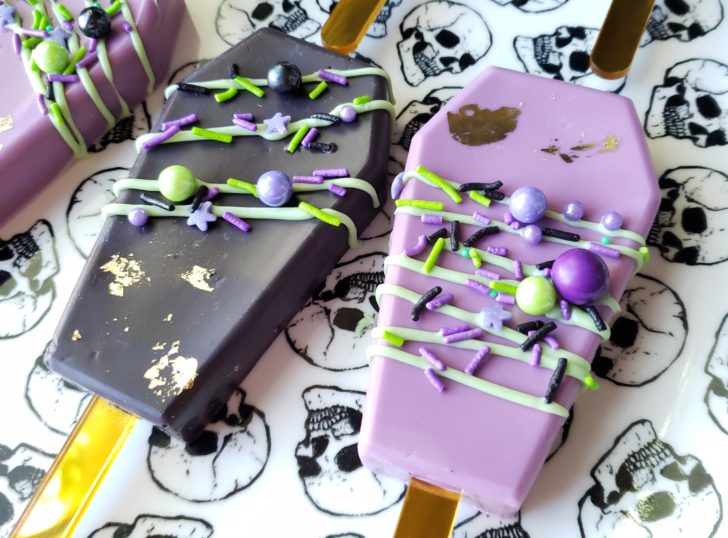
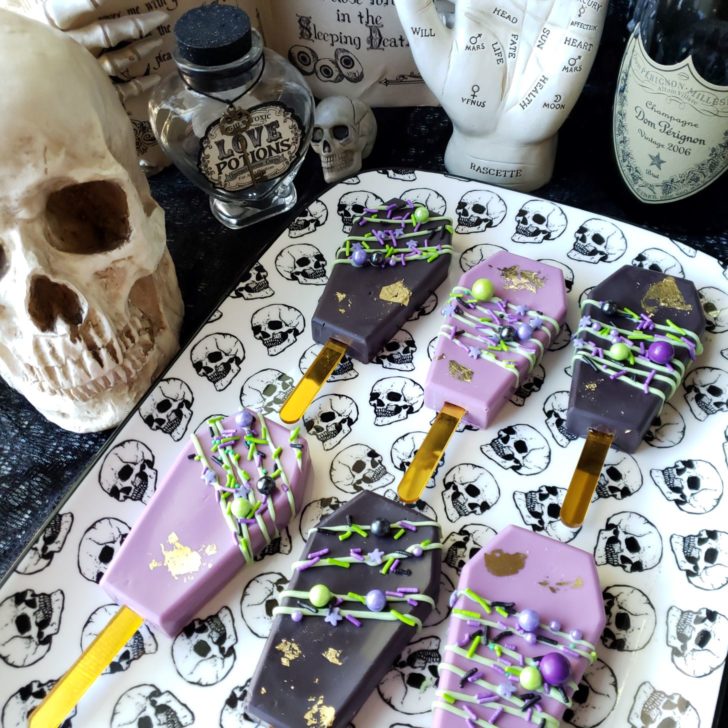
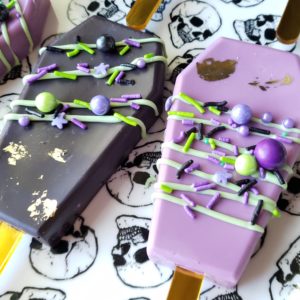
Cakesicles, or cake popsicles, are a yummy twist on cake pops. They’re bigger, fancy, and you don’t have to roll out a bunch perfect little cake balls to make them. If you’re a cake pop fan, you’ll love cakesicles!
I love everything from Fancy Sprinkles, so when I was stocking up on Halloween sprinkles this year, and saw that they had these cute coffin cakesicle molds, I had to snag one! The mold even comes with the fabulous gold popsicle sticks.
As an Amazon Associate I earn from qualifying purchases.
Supplies, Equipment & Ingredients:
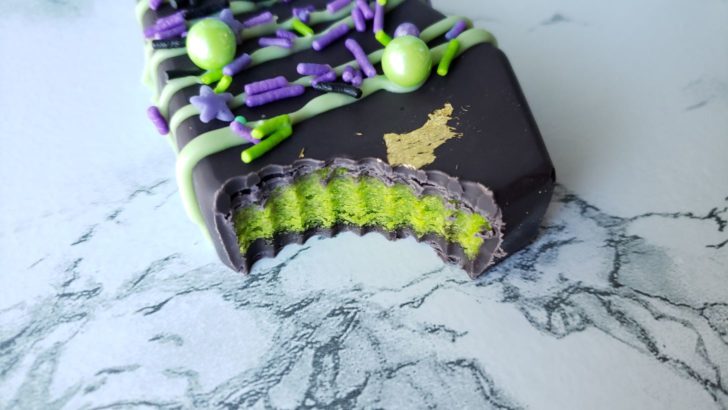
- Cake: You will need to bake some cake ahead of time for these cakesicles. You can use box mix, or a from-scratch recipe, and any flavor you want. I used leftover Sugar Cookie Cake from my Beetlejuice Cake and have included that recipe.
- Frosting: You’ll only need a small amount of frosting, so here’s where I’m going to do my best Ina Garten and tell you that store-bought is fine.
- Chocolate: You can use real chocolate for these, but you will need to temper it. If you don’t want to mess with tempering chocolate, candy melts will work just fine! I used Sweet Tooth Fairy Meltables that I purchased from Michaels.
- Cakesicle Mold: I used the Elvira Coffin Mold from Fancy Sprinkles. I also have these cakesicle molds that I purchased on amazon that would make cute ghosts.
- Sprinkles: I used Nevermore Sprinkles from Fancy Sprinkles.
- Paintbrush: You want to use a larger food safe paintbrush. I used a 1.5″ filbert paintbrush with synthetic bristles.
- Stand Mixer or Food Processor
- Knife or Small Palette Knife
- Spoons and Spatulas
- Offset Spatula
- Popsicle Sticks
- Bowls
- Mug
- Gloves
Coffin Cakesicle Tutorial Video
Step 1:
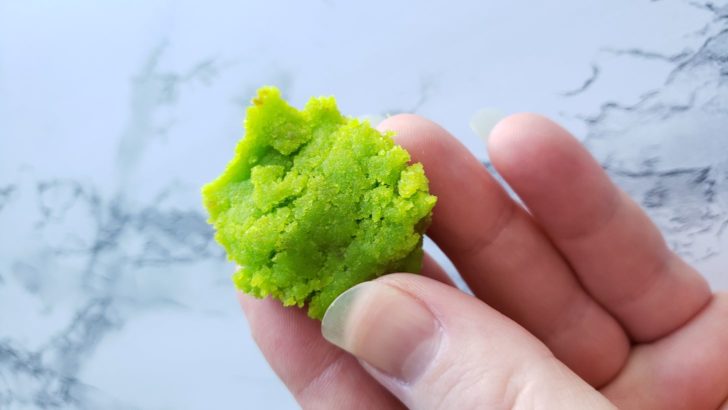
- Crumble up fully cooled cake and add to bowl of stand mixer with a paddle attachment, or use a food processor.
- Mix in mixer on low speed, or pulse in food processor, until cake is the texture of coarse sand.
- Add a small amount of frosting to cake and mix on low speed until fully incorporated.
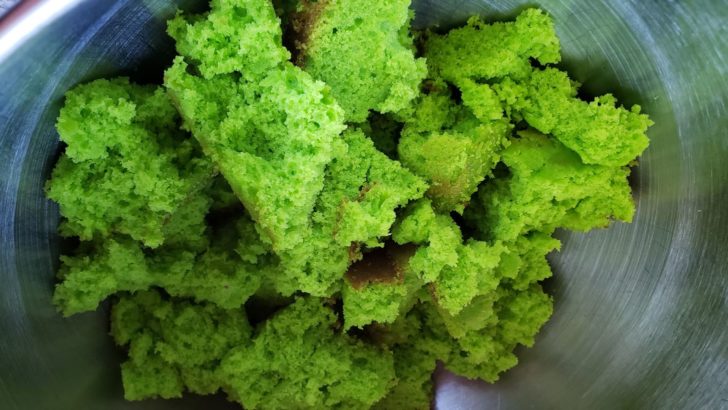
You only want to add just enough frosting to your cake to make it stick together. I used less than 1 tablespoon for a 6″ round cake. Adding too much frosting can cause your cakesicle to leak butter. Your cake filling has enough frosting if it sticks together when your squeeze it in your hand.
Step 2:
- Microwave candy melts in microwave safe bowl for 30 second increments until fully melted.
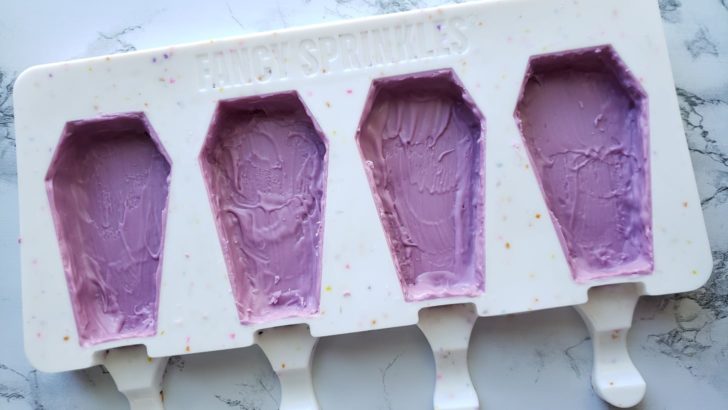
- Using a clean and dry paintbrush, paint melted chocolate into molds and then pop into freezer or refrigerator until firm.
- Paint 2-3 layers making sure to cover entire surface.
- You want the chocolate layer to be about ⅛″ thick.
Only leave chocolate in the freezer long enough to firm up, which should only take a few minutes. Freezing chocolate for a longer amount of time can cause it to crack.
Step 3:
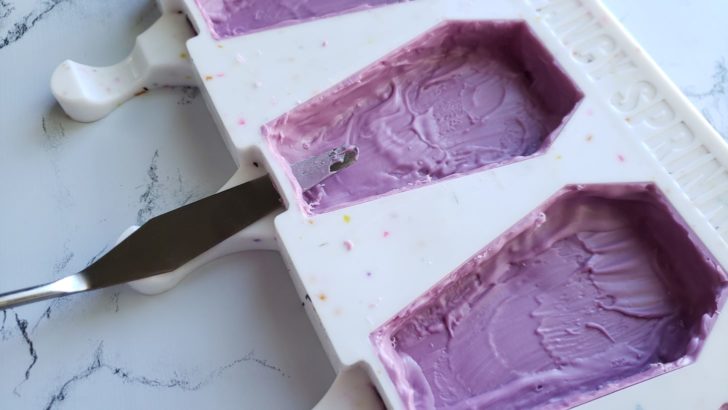
- Warm up a small palette knife, offset spatula, or knife in a mug of hot water, and then push it through the popsicle stick hole.
- Wiggle the palette knife around to make sure the hole is large enough for the popsicle stick.
I have tried every way to make a hole for the popsicle stick and this is the way that works best for me. You can add the popsicle stick while the chocolate is still melted, but I found that sometimes the popsicle stick will stick to the cooled chocolate, and I’d end up with cracks.
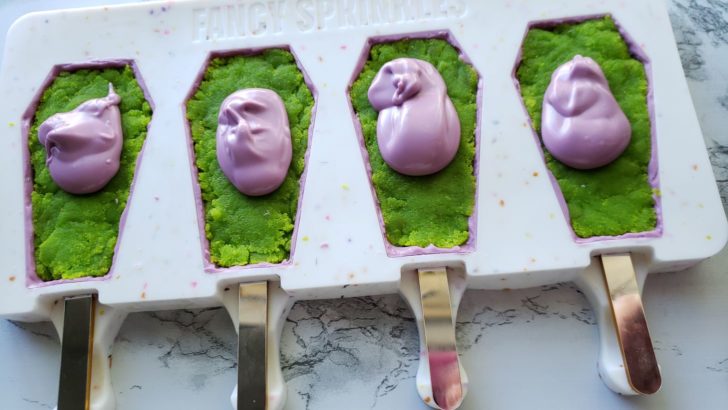
Step 4:
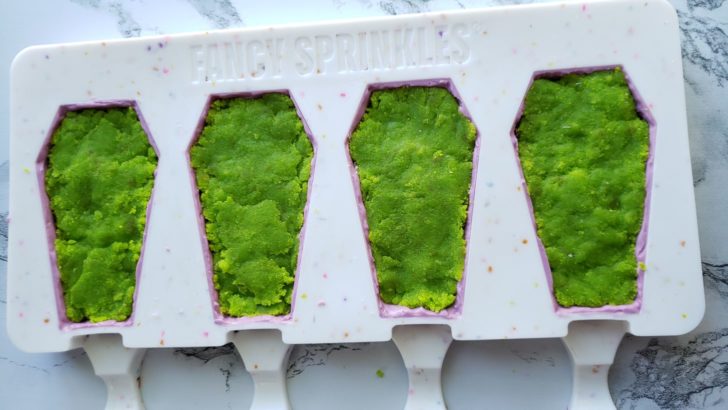
- Fill your molds with the cake filling. Lightly press it down, making sure there are no air gaps, but be careful not to push too hard or you’ll crack the chocolate.
- Don’t fill the molds all the way to the top, as you want to leave a little room that will be filled with chocolate.
Step 5:
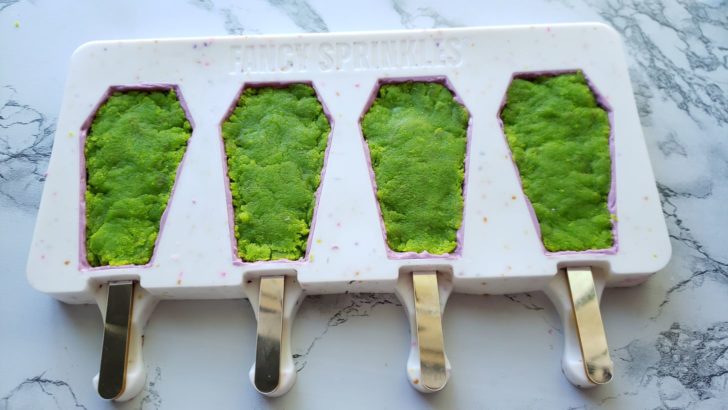
- Slide in the popsicle sticks and push down any cake filling that might have been moved by the stick.
Step 6:
- Add about a tablespoon of melted chocolate to each mold.
- Spread out the chocolate so that the entire surface is covered.
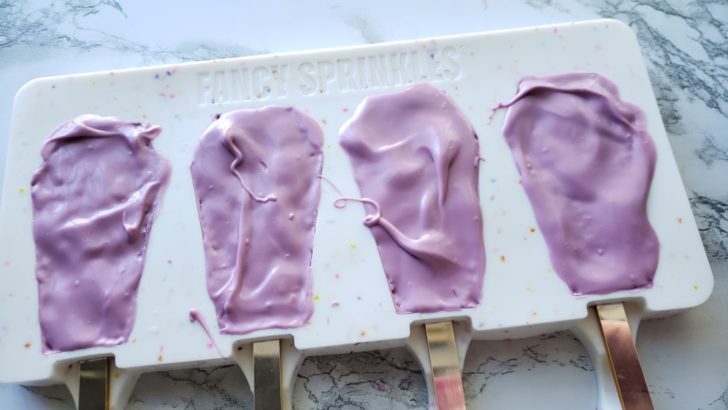
- Before chocolate dries, roughly smooth it out.
- Then pop your cakesicles into the fridge or freezer until firm.
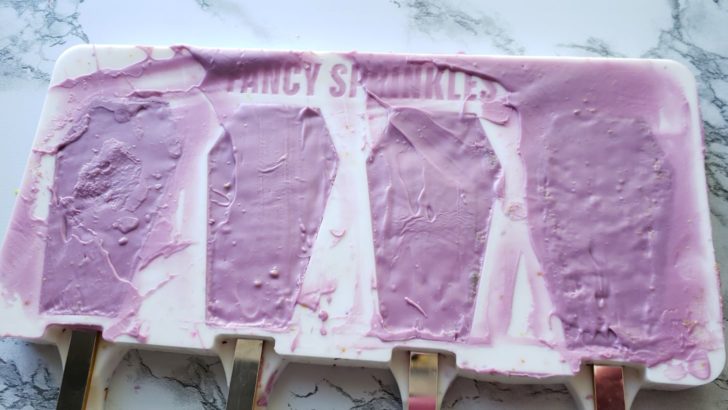
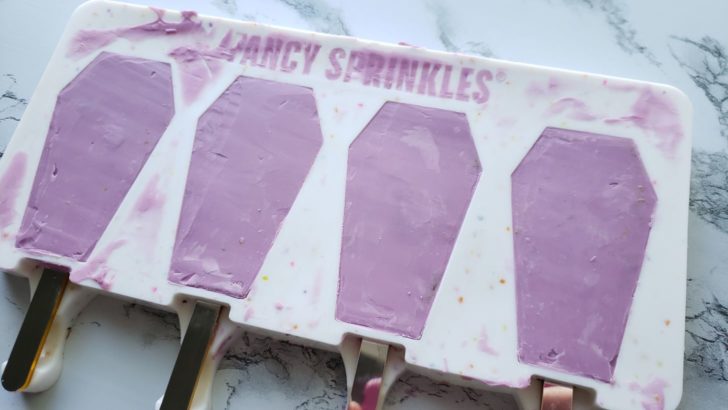
Step 7:
This extra little step will give you cakesicles with perfectly smooth bottoms, so that they lay flat.
- Warm up a small offset spatula in a mug of hot water and run it over the chocolate a few times to smooth out the chocolate and clean up the edges.
Step 8:
- Carefully remove cakesicles from mold.
- I recommend wearing gloves when removing cakesicles from mold so you don’t leave fingerprints in the chocolate.
- Drizzle with more chocolate and decorate with sprinkles.
Equipment
- measuring cups and spoons
- mixing bowls
- whisk
- spatula
- stand mixer with whip attachment (hand-mixer can also be used)
- cake or cupcake pan
- parchment paper or cupcake liners
- non-stick spray
Ingredients
- 1 cup white granulated sugar
- ½ cup unsalted butter room temperature
- 2 large eggs room temperature
- 2 teaspoons vanilla extract or seeds from 2 vanilla beans
- 1 ½ cups all-purpose flour
- 1 ¾ teaspoons baking powder
- ½ cup milk room temperature
Instructions
- Sift together dry ingredients and set aside.
- With whip attachment, cream butter and sugar, on medium-high speed, until fluffy and pale in color.
- Add eggs and vanilla extract. Mix on low speed until fully incorporated.
- Add dry ingredients into wet and mix on low speed, drizzle in milk and mix until batter is smooth. Do not overmix.
- Spray cake pan with non-stick spray, line bottom with parchment paper, and spray again. Or line cupcake pan with liners and fill ⅔ way full with batter.
- Bake for 30-40 minutes (20-25 min for cupcakes), rotating pan halfway through. Cake is done when it is golden brown and springs back to the touch.
- Allow cake or cupcakes to fully cool before frosting.


Have a comment or question?